After validation of the user inputs, we are sure that we have all the data we need to create a new entry in the products table. Well, not exactly! Take a look at the structure of the products table and you’ll find the column named image_url, we shall store the URL of the image of the product here. But we don’t have the URL yet. So first of all we have to upload the image selected by the user to the server, and then get its path, and then only we’ll be ready to store the product information on the database.
Now the steps we have to take are-
Steps:
- Get the image inside the store method
- Create a unique name for the file
- Upload the image
- Get the path
You will be surprised to see how easy it is in Laravel.
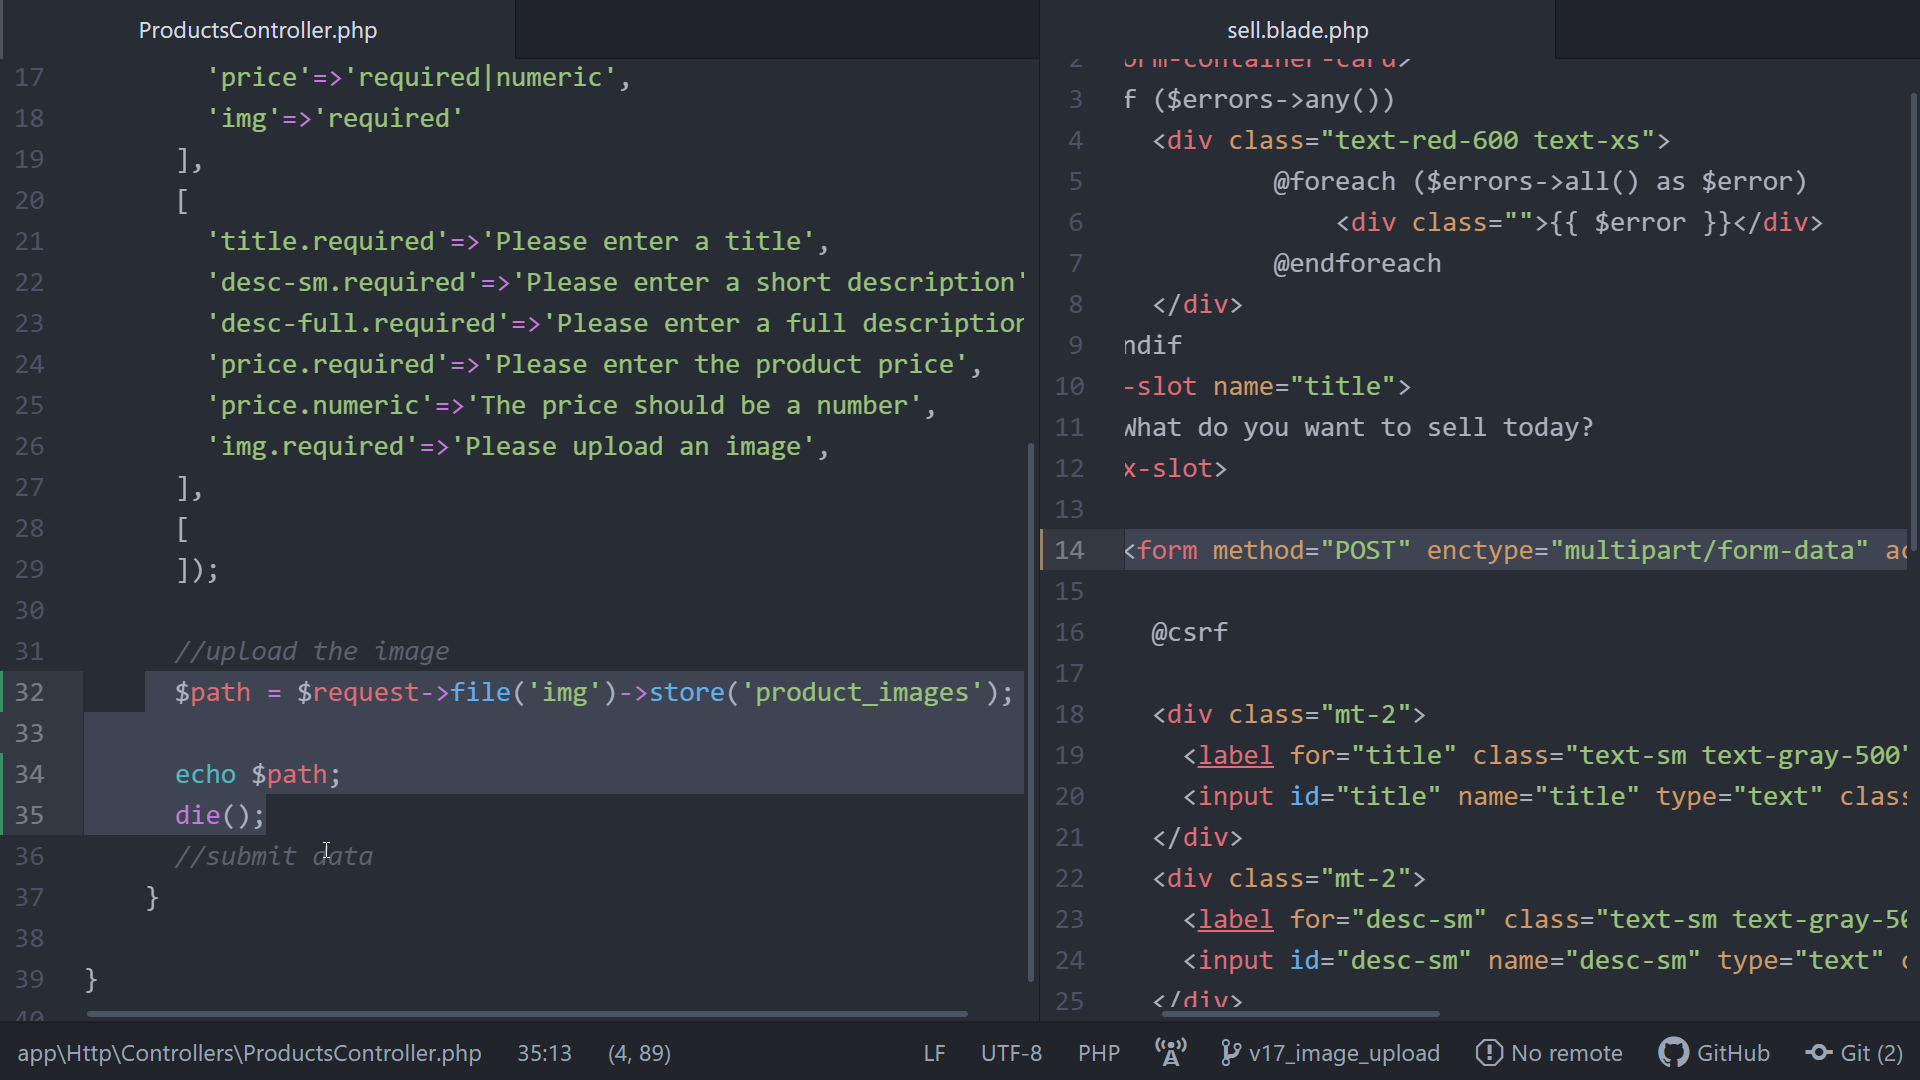
First, call the function file() on the request object to get the file submitted with the form, we have to pass the name of the input field for the file (it is ‘img’ in our case). Then call another function named store(). We have to pass the path to store the file, let’s simply pass the folder name where we want to store it (let’s name it product_images ), the folder does not exist now, so it will be automatically created and this store() function also generates a unique name for the file.
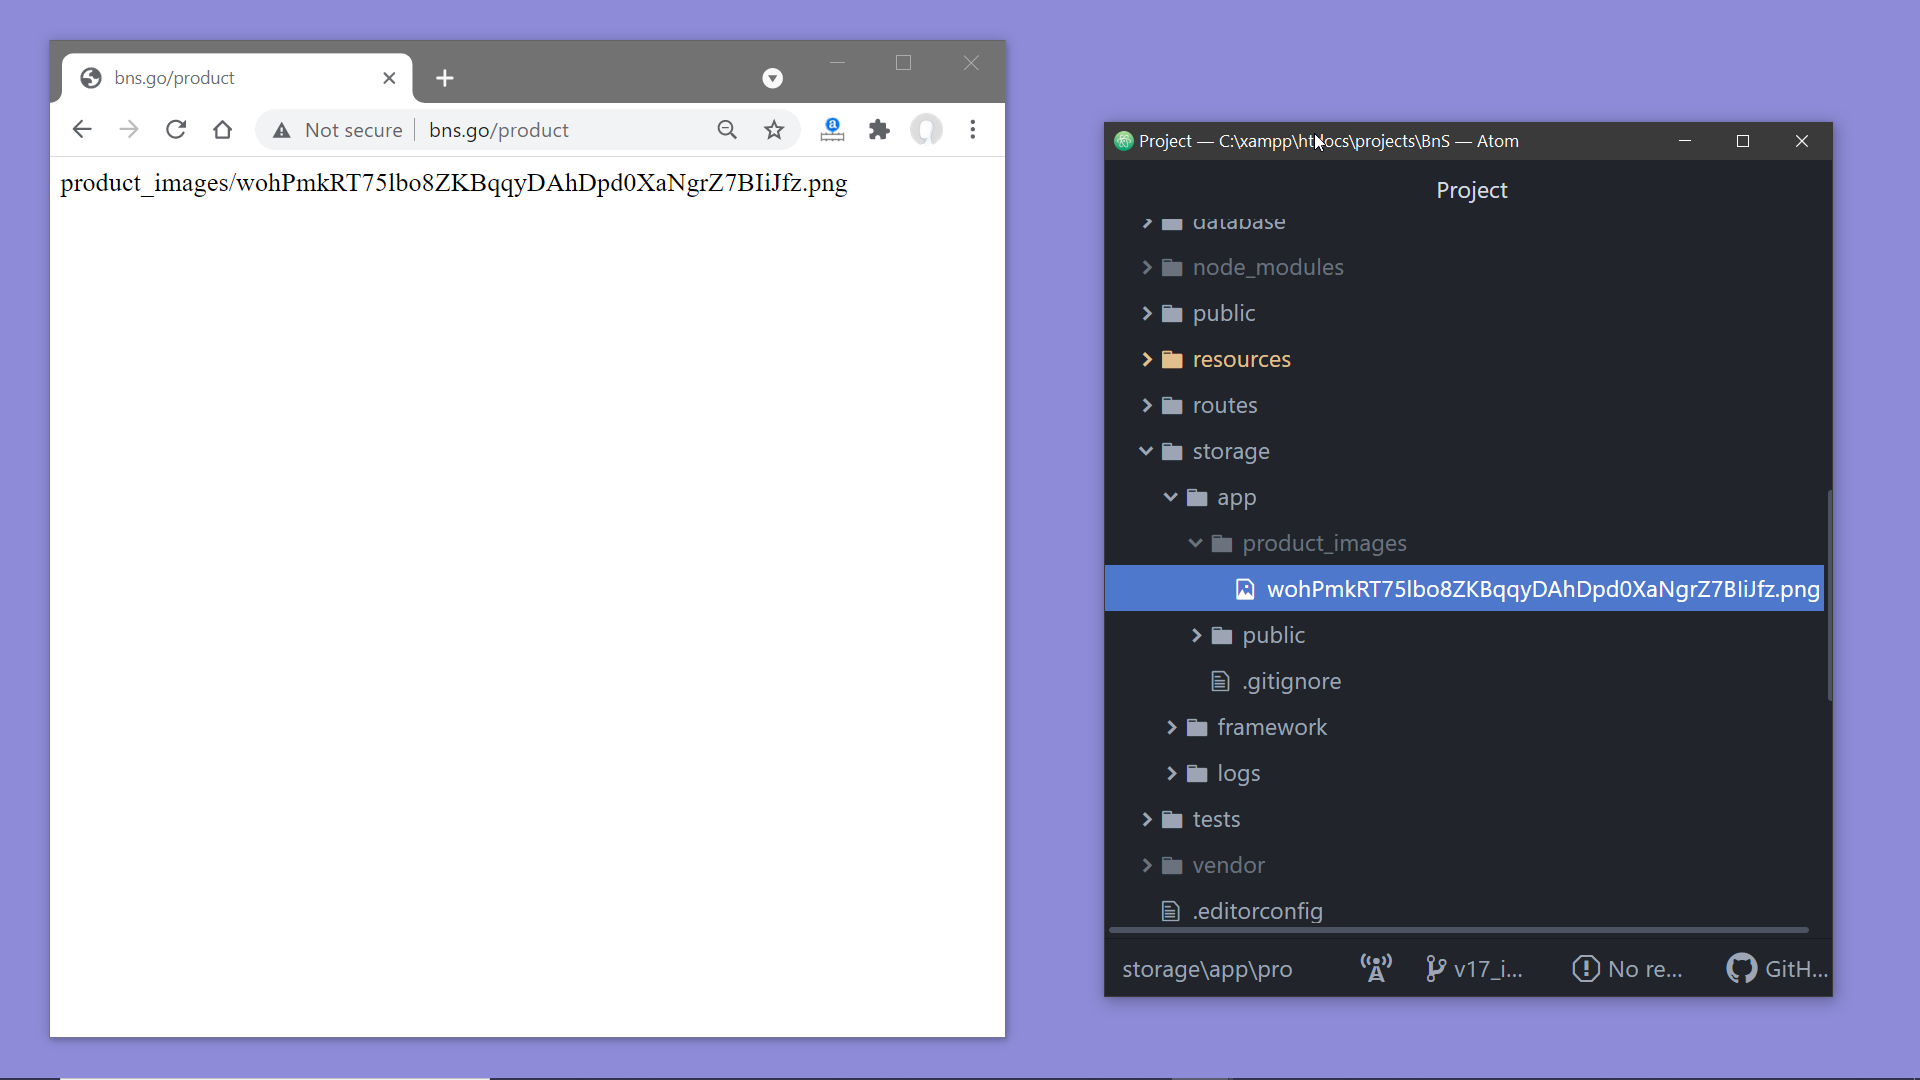
Finally, we have to get the path of the uploaded image, right ! to store on the database. This function store() returns that path, we simply need to create a variable to hold it. $path=$request→file('img')→store('product_images')
If you want to see the path, add an echo statement to print it and call the function die() to stop further execution. echo $path; die(); Now, if you reload the page and try to submit the form with an image, you’ll get an error. This is because we have to add the attribute enctype="multipart/form-data" in our form to be able to submit an image or a file. So open sell.bade.php and to the form tag add enctype="multipart/form-data" .
<x-base-layout>
  <x-form-container-card>
    @if ($errors->any())
        <div class="text-red-600 text-xs">
                @foreach ($errors->all() as $error)
                    <div class="">{{ $error }}</div>
                @endforeach
        </div>
    @endif
    <x-slot name="title">
      What do you want to sell today?
    </x-slot>

      <form method="POST" enctype="multipart/form-data" action="/product">

        @csrf

        <div class="mt-2">
          <label for="title" class="text-sm text-gray-500">Product title</label>
          <input id="title" name="title" type="text" class="rounded-md shadow-sm border-gray-300 focus:border-indigo-300 w-full">
        </div>
        <div class="mt-2">
          <label for="desc-sm" class="text-sm text-gray-500">Add a short description of the product</label>
          <input id="desc-sm" name="desc-sm" type="text" class="rounded-md shadow-sm border-gray-300 focus:border-indigo-300 w-full">
        </div>
        <div class="mt-2">
          <label for="desc-full" class="text-sm text-gray-500">Add the complete description of the product</label>
          <textarea id="desc-full" name="desc-full" class="rounded-md shadow-sm border-gray-300 focus:border-indigo-300 w-full"></textarea>
        </div>
        <div class="mt-2">
          <label for="price" class="text-sm text-gray-500">Price</label>
          <input id="price" name="price" type="text" class="rounded-md shadow-sm border-gray-300 focus:border-indigo-300 w-full">
        </div>

        <div class="mt-2">
          <label for="img" class="text-sm text-gray-500">Select an image</label>
          <input id="img" name="img" type="file" class="w-full">
        </div>

        <x-button class="mt-4 w-full justify-center">
            Post the ad
        </x-button>

      </form>
  </x-form-container-card>
</x-base-layout>
Now, reload the page, fill-up the form, select an image and submit the form…. and the image has been successfully uploaded. We can see the path on the screen and a new folder named product_images has been created inside the /storage/app and the image has been stored in this new folder.
Now remove the echo statement and the call to the function die() and we can proceed to the next task— storing the data on the database.