We have validated our form, uploaded the product image now it’s time to save the products information on the database. To interact with the database table products we shall use our model Product. So let’s get started.
Two main points of focus for this video are-
- Using a model to store data on the database, and
- Getting the user id of the logged-in user.
First, open the ProductsController.
Inside the store() function after uploading the image, first, create an instance of the model class, $product=new Product()
To be able to access this class we must include the class at the top of the file, use App\Models\Product;
The input values can be accessed by calling the function input() on the $request object. So, let’s get those values and assign them to the corresponding fields of the product instance. $product=new Product();
$product->title=$request->input('title');
$product->short_desc=$request->input('desc-sm');
$product->long_desc=$request->input('desc-full');
$product->price=$request->input('price');
Notice the names of the fields, the fields of the product class have the same name as what we provided for the columns of the table. And the string we pass to the input() function are the names that we provided to the input fields of the form. To the field image_url we shall assign the variable $path, as it holds the path to the uploaded image. $product->image_url=$path;
We also have to store the user_id of the user submitting this product ad. We shall use the class Auth to get the id of the logged-in user. $product->user_id=Auth::id();
To use this class inside the code we first have to include it at the top, add this line at the top. use Illuminate\Support\Facades\Auth;
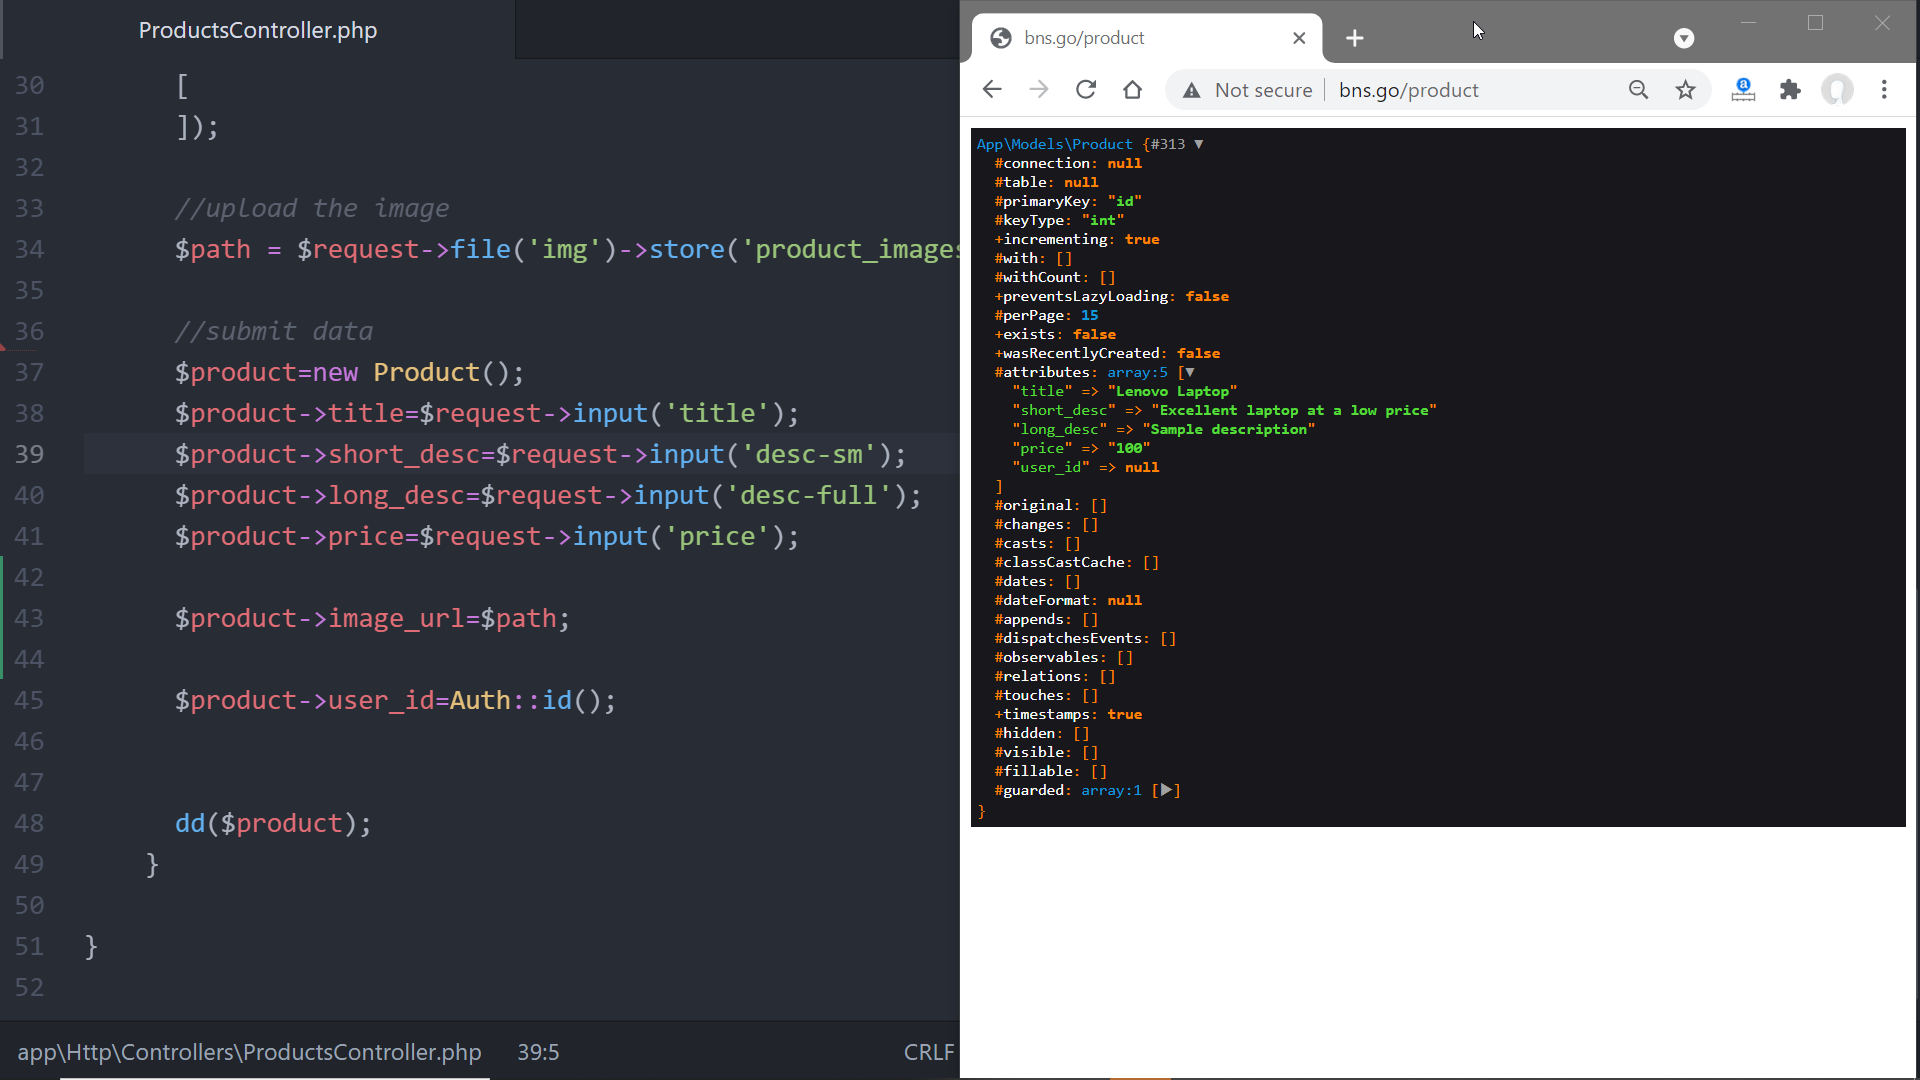
Now call the function dd() once to see the content of the $product instance. dd($product);
The complete source code looks like the one below:
<?php
namespace App\Http\Controllers;
use Illuminate\Http\Request;
use Illuminate\Support\Facades\Auth;
use App\Models\Product;
class ProductsController extends Controller
{
//Add product information to the database
public function store(Request $request){
//validate the incoming data
$request->validate([
'title'=>'required',
'desc-sm'=>'required',
'desc-full'=>'required',
'price'=>'required|numeric',
'img'=>'required'
],
[
'title.required'=>'Please enter a title',
'desc-sm.required'=>'Please enter a short description',
'desc-full.required'=>'Please enter a full description',
'price.required'=>'Please enter the product price',
'price.numeric'=>'The price should be a number',
'img.required'=>'Please upload an image',
],
[
]);
//upload the image
$path = $request->file('img')->store('product_images');
//submit data
$product=new Product();
$product->title=$request->input('title');
$product->short_desc=$request->input('desc-sm');
$product->long_desc=$request->input('desc-full');
$product->price=$request->input('price');
$product->image_url=$path;
$product->user_id=Auth::id();
dd($product);
}
}Now let’s reload the page and, fill up the form, and submit. We’ll see lots of information about the product instance gets printed on the screen. If we expand the field attributes you’ll see the values of the fields. And you will also notice that the user_id is null, this is because we are currently not logged in. If we log in and try again then we will see a non-null user_id here. But we should not have been able to submit the form without logging in right. If an unauthenticated user clicks on the sell button we have to redirect the user to the login screen. I will show you how to do that using middleware in the next video.
But for now, let’s stay logged in.
Come back to the code of the ProductsController. Remove the call to the function dd() (dump and die) and call the function save() on the product instance ($product). $product->save();
<?php
namespace App\Http\Controllers;
use Illuminate\Http\Request;
use Illuminate\Support\Facades\Auth;
use App\Models\Product;
class ProductsController extends Controller
{
//Add product information to the database
public function store(Request $request){
//validate the incoming data
$request->validate([
'title'=>'required',
'desc-sm'=>'required',
'desc-full'=>'required',
'price'=>'required|numeric',
'img'=>'required'
],
[
'title.required'=>'Please enter a title',
'desc-sm.required'=>'Please enter a short description',
'desc-full.required'=>'Please enter a full description',
'price.required'=>'Please enter the product price',
'price.numeric'=>'The price should be a number',
'img.required'=>'Please upload an image',
],
[
]);
//upload the image
$path = $request->file('img')->store('product_images');
//submit data
$product=new Product();
$product->title=$request->input('title');
$product->short_desc=$request->input('desc-sm');
$product->long_desc=$request->input('desc-full');
$product->price=$request->input('price');
$product->image_url=$path;
$product->user_id=Auth::id();
$product->save();
}
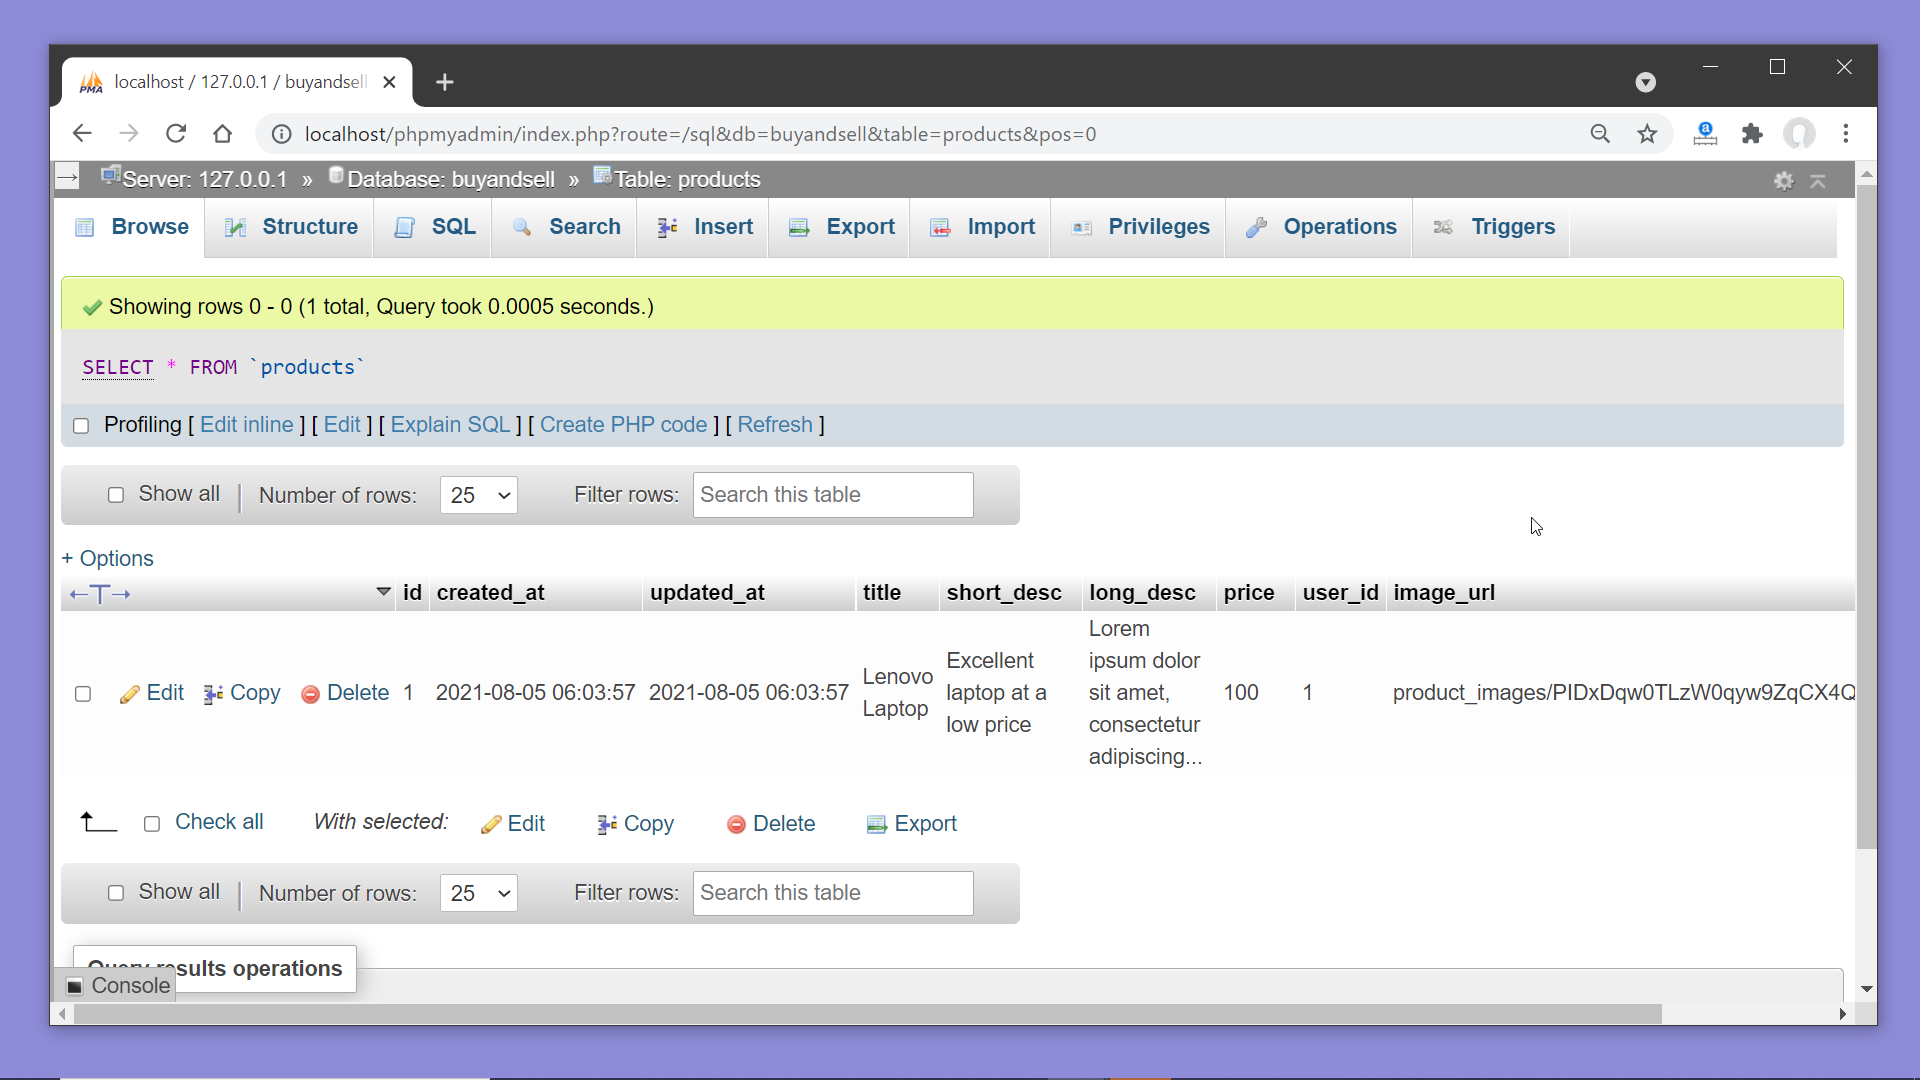
}Now reload the page, and submit a filled up form ….
And if we take a look at the products table on the database, we can see the newly added product here.
With this, we have completed a very important milestone of our project. So we have started dealing with actual content, and soon we shall start displaying the actual data from the database on our product list and product details pages. But before we proceed we have to redirect the user to a proper place once the form submission is successful. Let’s take the user to the details page of the recently added product. For that after calling save() on the product instance add a return statement. We shall call the function redirect() and pass the route to which we want to redirect. Now the route for the product details page looks like this /product/id, we have the pass the product id right! We can get the id of the recently added product from this field id of the Product model. return redirect('/product/'.$product->id);
Now the complete code looks like this:
<?php

namespace App\Http\Controllers;

use Illuminate\Http\Request;
use Illuminate\Support\Facades\Auth;
use App\Models\Product;


class ProductsController extends Controller
{
    //Add product information to the database
    public function store(Request $request){

      //validate the incoming data
      $request->validate([
        'title'=>'required',
        'desc-sm'=>'required',
        'desc-full'=>'required',
        'price'=>'required|numeric',
        'img'=>'required'
      ],
      [
        'title.required'=>'Please enter a title',
        'desc-sm.required'=>'Please enter a short description',
        'desc-full.required'=>'Please enter a full description',
        'price.required'=>'Please enter the product price',
        'price.numeric'=>'The price should be a number',
        'img.required'=>'Please upload an image',
      ],
      [
      ]);

      //upload the image
      $path = $request->file('img')->store('product_images');

      //submit data
      $product=new Product();
      $product->title=$request->input('title');
      $product->short_desc=$request->input('desc-sm');
      $product->long_desc=$request->input('desc-full');
      $product->price=$request->input('price');

      $product->image_url=$path;

      $product->user_id=Auth::id();

      $product->save();

      return redirect('/product/'.$product->id);
    }

}
And once again try submitting a form, this time you’ll be redirected to the product details page. The product details page is still displaying the static dummy content which we shall replace with the content from the database soon.
So our form for posting an ad look complete, it displays errors for invalid inputs, submits data and those data gets inserted into the database, and then it redirects the user to the details page. The only thing left is to restrict the access of this form only to logged-in users. I’ll show you how to do that in the next video.