In this lesson, I shall walk you through the important components of a Laravel project. Here inside the project directory, we have multiple folders and files.

- First of all, I would want you to take a look at this file named .env. This file is used to define some common configurations for the project. We define configuration-related values here in this file. Like the information related to the database connection. And these values are accessed from the configuration files that are inside the config folder.

- All of the configuration files of the Laravel framework are stored inside this config folder. You’ll find some general configurations like the Website name and the URL etc in this file app.php Similarly, the database.php file contains database-related configuration values.

- In these files, you’ll find calls to a function called env(), these calls are made to access the values of the .env file. The first argument corresponds to the name of a configuration value of the .env file and the second argument is a default value. If you remove these env() function calls and add the actual values here itself, then also it will work. But,… it is much more convenient to have a single place for specifying all the configuration values. Thus we have the .env file and we shall make changes to the configuration values of the file as and when we need.
- Now let us talk about the layouts or the UIs of the website. The files responsible for the layouts of the pages have to be kept inside this folder views which is inside the folder resources. Currently, we have only one view here, as the default website has only one simple page. Notice the file name, it is welcome.blade.php . .blade.php extension is used to indicate that blade templating has been used. We shall learn more about blade templates when we start creating the layouts of our own. Inside this file, you will find the HTML and some CSS used for creating the home page.

- We shall write our CSS styles inside this folder css inside resources, and the JS inside this resources/js. This resources folder also has a folder called lang to contain all language files, but we are not concerned about them for this project.
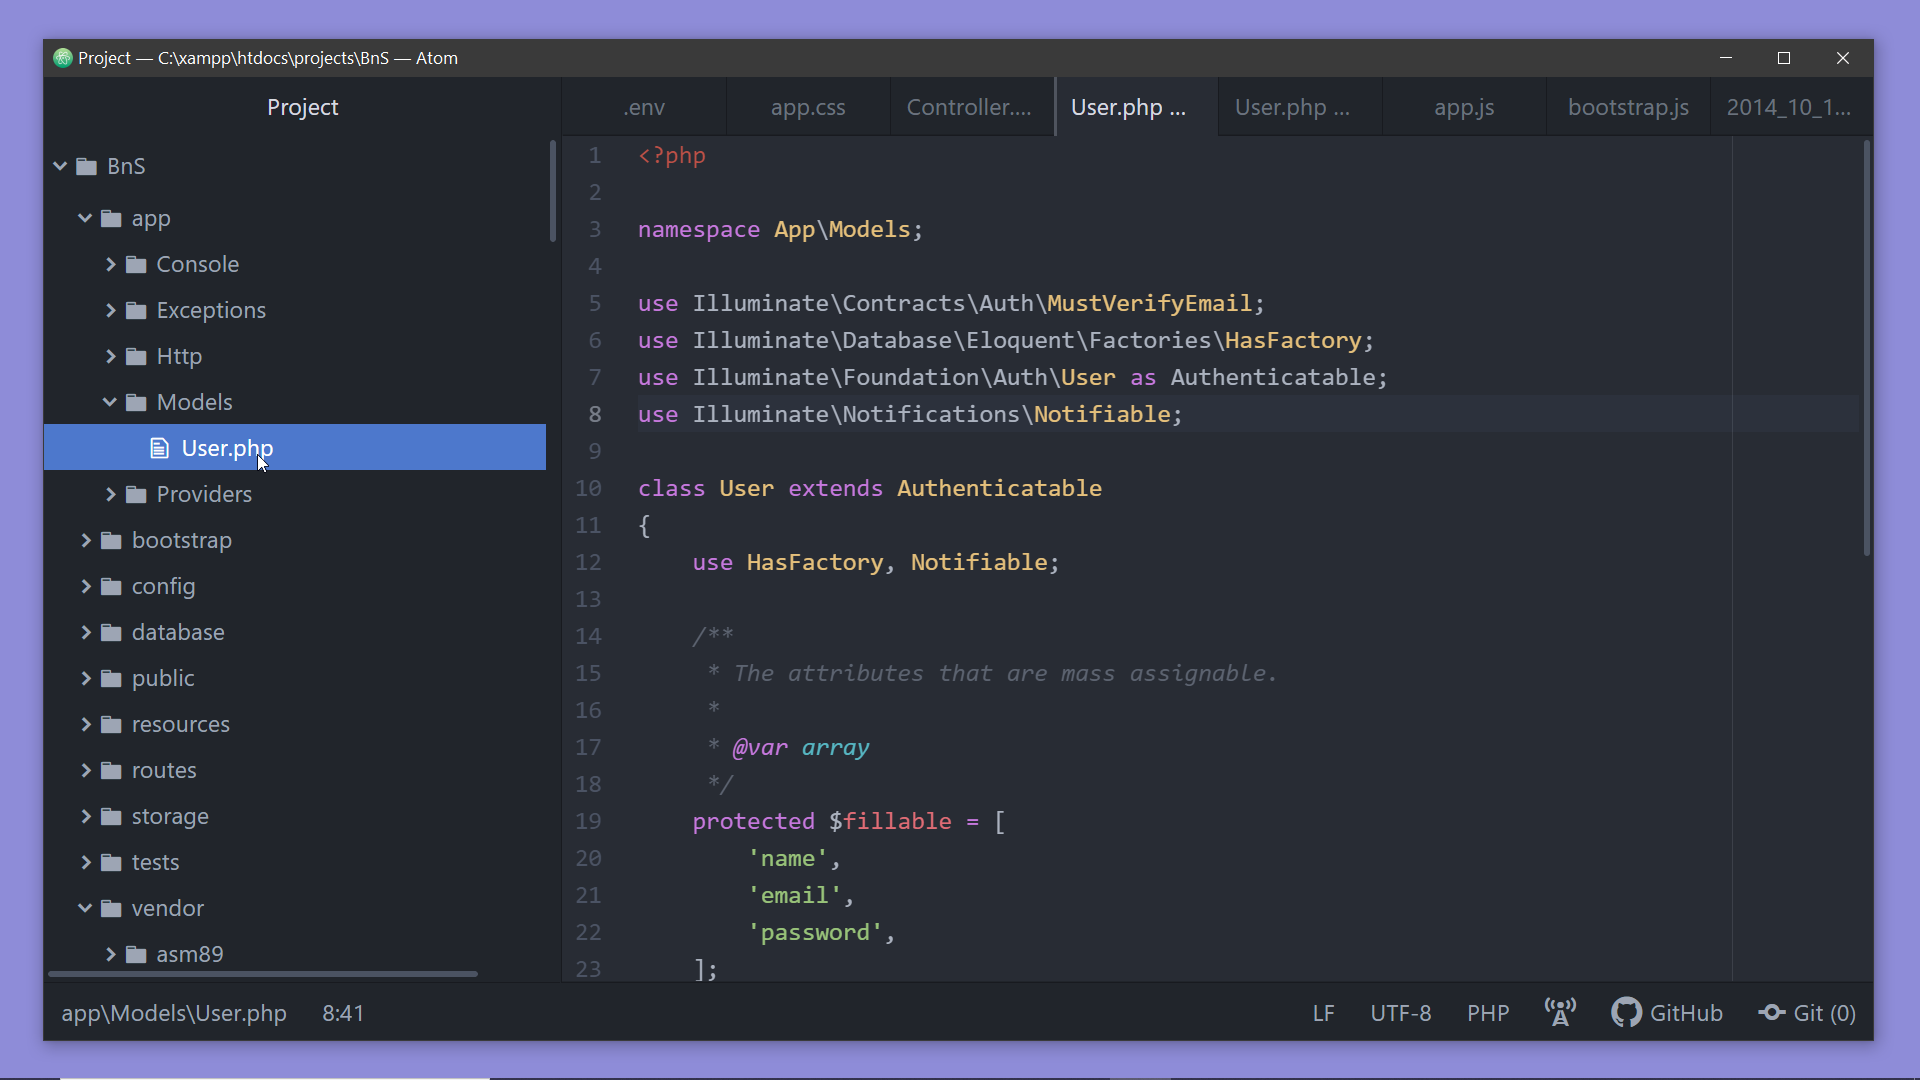
- The files inside the folder resources/views are the views or the layouts. These files are responsible only for the UI, they know nothing about the business logic, they don’t where to get the data from, they are unaware of the database and other backend-related stuff. The data to be displayed is simply passed to the views. But how do we get the data from database? – For that we have Models. And Laravel by default includes an Object Relational Mapper called Eloquent. Eloquent Models have magical powers, let us take a look at one that came inbuilt with the project. Go to this directory app → Models, and open the file User.php . This is a Model that is responsible for interacting with the users table of our database, you won’t see much code inside such a class but you’ll be surprised to know the capabilities of these Models. Using a Model we can read data from the corresponding table of the database, add new items, update existing items and also delete items from the table. We shall explore more about models when we create our own.
- Now we have the Models to interact with the database, and Views to interact with the users. We can call the function all() on a Model to get all the items from the corresponding table of the database (e.g. Product::all()). But we don’t write these model-related codes inside a view, the data to be displayed should be passed directly to the view. Now the question comes—- Where to write the code for database requests? The answer is inside a controller. A controller sits in between a Model and a View. It fetches data from the database using a Model and passes it to the concerned View. A View interacts with the user and passes the user inputs to the controller, and the controller takes the action as per the request. And these actions often involve a Model to interact with the database. And there is a folder named Controllers inside app→Http , where we have to keep all our controllers.

- Now we have the Views for the user interactions, the Models for the interactions with the Database, and then the Controllers for the interactions between the Views and the Models. We write functions for the different tasks inside a controller. For example, we will have a function to retrieve the list of products, another to retrieve the details of a particular product by ID, functions for deleting a product, etc. Now the question is- how do we invoke these functions? For example on clicking an item on the list of products, we call the controller function for product details. And we do that with help of the routes. Routes are used to route the HTTP requests to the code that handles them.
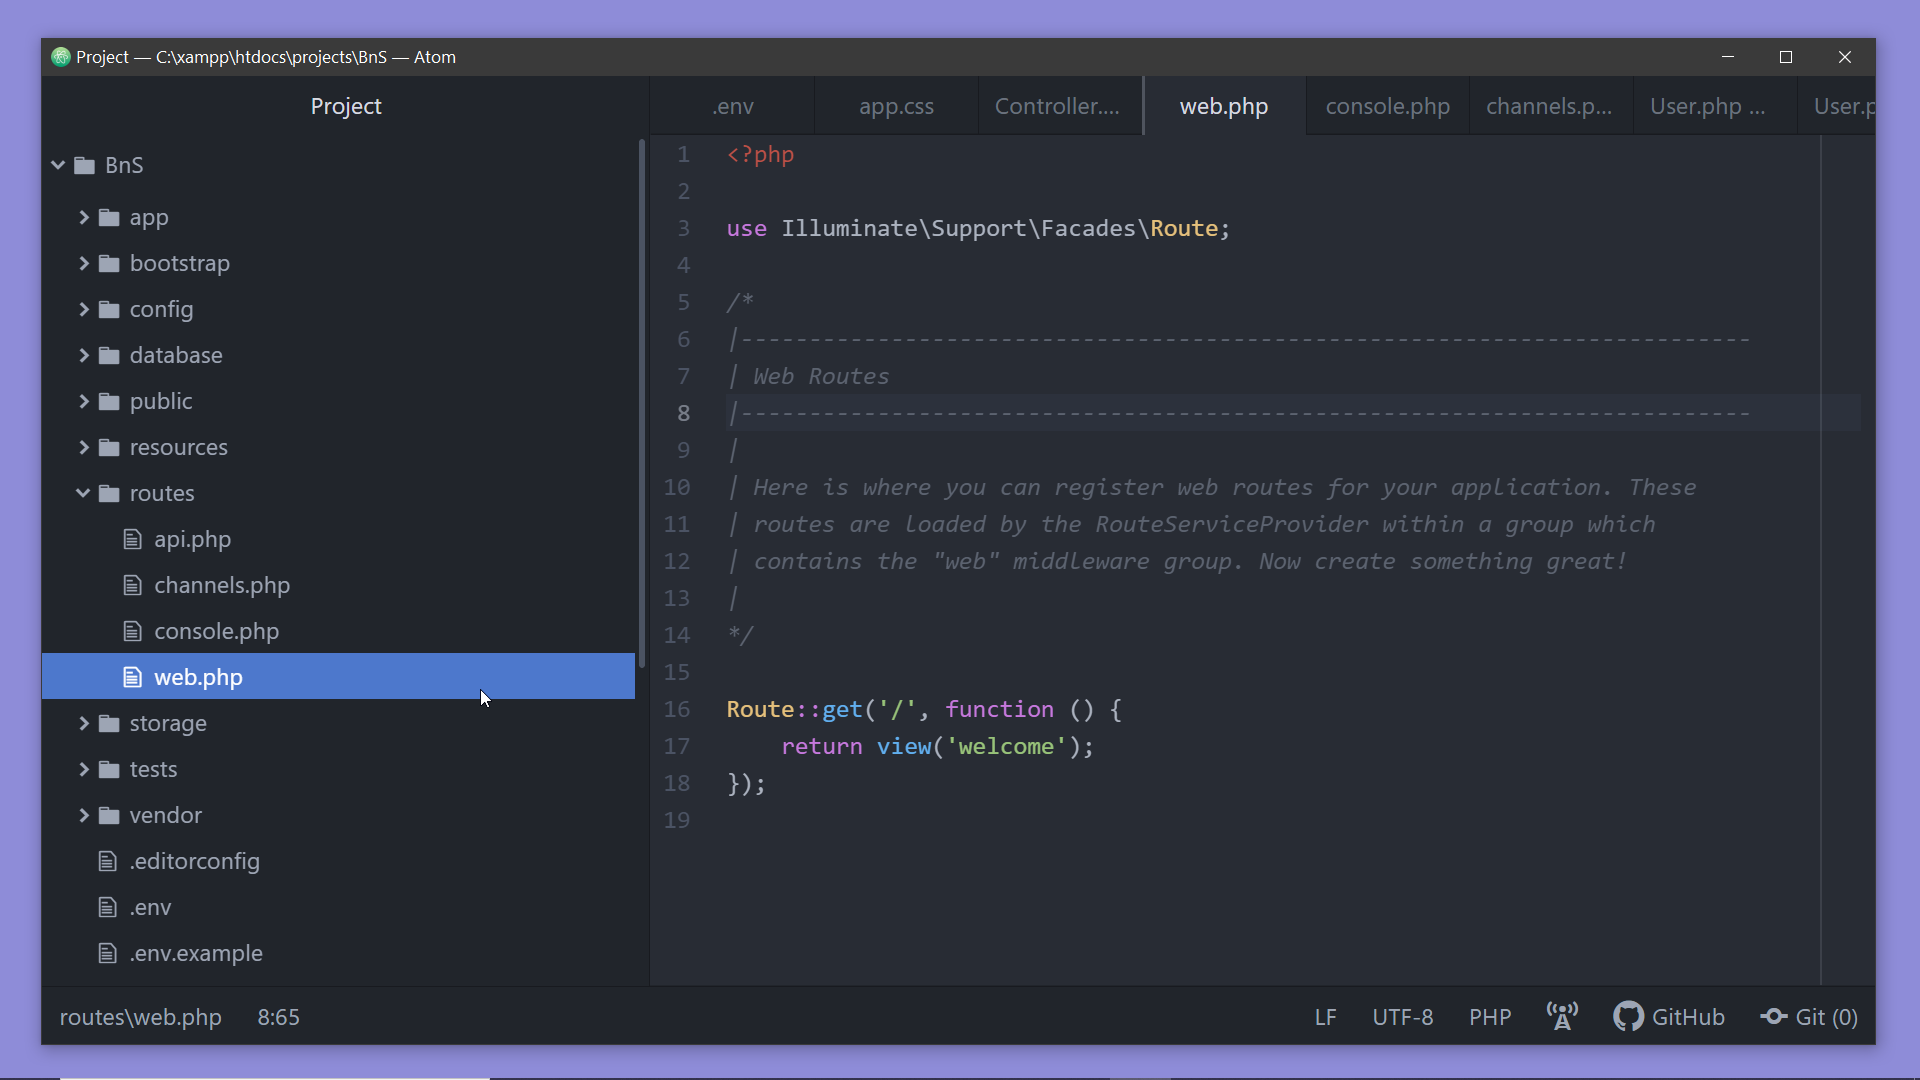
- You will find a folder named routes to keep all the route files. Currently, there are four files but for this project we are concerned only with the route file names web.php, this is where we have to define all the routes for our website. If you open the file web.php, you will find that one route is already defined in the file, this is for the home page of the website. When we enter the URL http://bns.go on the browser, this route comes into action and loads the view named welcome.
- There are a few more directories in the project that we shall access during the course, and I’ll explain their purpose when we use them. For example, in the next video itself while implementing authentication I’ll introduce you to the migrations folder that is inside the database folder.