We have talked about this,… about the maintainability of our application. Currently, we are duplicating a lot of code. Let me put the codes for the products list page and the product details page side by side. I am also collapsing the divs for ease of viewing.
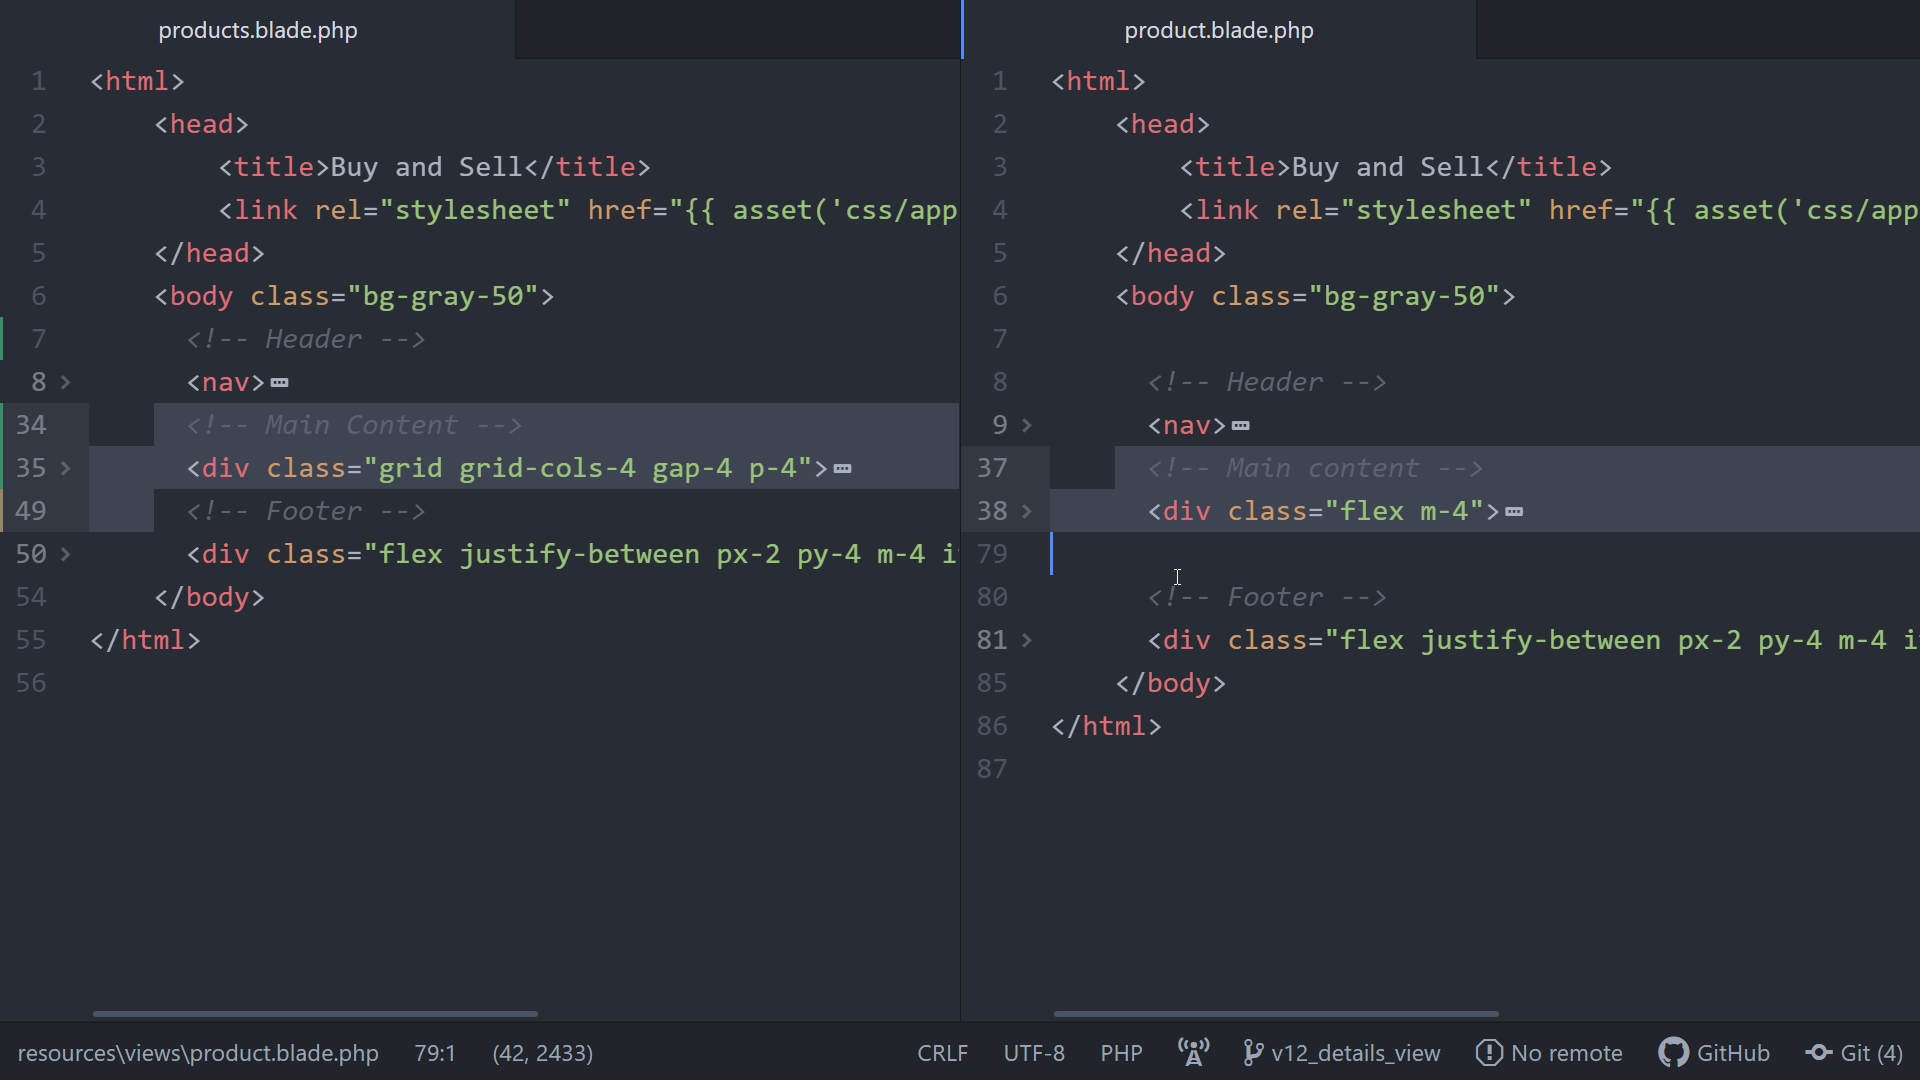
Here you’ll notice that only the portion named main content is different for the two pages, the rest of the code is the same.
Duplication of code is bad and code reuse is good. So in this video, we shall find a way to reuse the common code. We shall create something like a template for the structure of the individual pages of the app containing the header and the footer, basically the non-changing portions. And we shall define a container for the page-specific content.
Let’s take a look at the dashboard.blade.php file. Now you may be wondering – what is this tag at the root <x-app-layout> ? And what is <x-slot>? You’ll find similar elements inside the authentication-related views too, which are added by Laravel Breeze inside the auth directory. ******I will clear your doubts in this video itself. We shall display this type of tags in our view too. So by the end of the video there will be no visual changes in the pages of our website but the underlying code for the views will look somewhat similar to the code of the dashboard view.
<x-app-layout>
    <x-slot name="header">
        <h2 class="font-semibold text-xl text-gray-800 leading-tight">
            {{ __('Dashboard') }}
        </h2>
    </x-slot>

    <div class="py-12">
        <div class="max-w-7xl mx-auto sm:px-6 lg:px-8">
            <div class="bg-white overflow-hidden shadow-sm sm:rounded-lg">
                <div class="p-6 bg-white border-b border-gray-200">
                    You're logged in!
                </div>
            </div>
        </div>
    </div>
</x-app-layout>
Now back to the question what is this tag <x-app-layout> ? – This corresponds to a component.
And what is a component?
-Well, as the name suggests a component is a portion of the view. You may have already noticed that the dashboard.blade.php file does not contain the code for a header or a footer, it only contains the code for the main content. The common structure of the layout of a page is defined in a separate file that you can find inside the folder resources/views/layout named app.blade.php .
Open this file, and you will find the code that seems to be missing from the dashboard view. The HTML tag, the head, the body, etc. Here you will find that the navigation bar has been included from a different file and there is a portion named main content where a variable named slot is being printed.
<!DOCTYPE html>
<html lang="{{ str_replace('_', '-', app()->getLocale()) }}">
    <head>
        <meta charset="utf-8">
        <meta name="viewport" content="width=device-width, initial-scale=1">
        <meta name="csrf-token" content="{{ csrf_token() }}">

        <title>{{ config('app.name', 'Laravel') }}</title>

        <!-- Fonts -->
        <link rel="stylesheet" href="https://fonts.googleapis.com/css2?family=Nunito:wght@400;600;700&display=swap">

        <!-- Styles -->
        <link rel="stylesheet" href="{{ asset('css/app.css') }}">

        <!-- Scripts -->
        <script src="{{ asset('js/app.js') }}" defer></script>
    </head>
    <body class="font-sans antialiased">
        <div class="min-h-screen bg-gray-100">
            @include('layouts.navigation')

            <!-- Page Heading -->
            <header class="bg-white shadow">
                <div class="max-w-7xl mx-auto py-6 px-4 sm:px-6 lg:px-8">
                    {{ $header }}
                </div>
            </header>

            <!-- Page Content -->
            <main>
                {{ $slot }}
            </main>
        </div>
    </body>
</html>
This variable slot gets the content of the view that we define inside the tag corresponding to this component. Let’s come back to the dashboard view, here this tag is responsible for rendering the component that we have seen just now. And the content that we are adding inside these <x-app-layout> tags gets injected into the variable slot of the component.
And this whole magic is performed by the Blade Templating Engine, we don’t need to worry about the internals.
<x-app-layout>
    <x-slot name="header">
        <h2 class="font-semibold text-xl text-gray-800 leading-tight">
            {{ __('Dashboard') }}
        </h2>
    </x-slot>

    <!-- Content -->
    <div class="py-12">
        <div class="max-w-7xl mx-auto sm:px-6 lg:px-8">
            <div class="bg-white overflow-hidden shadow-sm sm:rounded-lg">
                <div class="p-6 bg-white border-b border-gray-200">
                    You're logged in!
                </div>
            </div>
        </div>
    </div>
</x-app-layout>
We have one more unknown tag inside the dashboard view <x-slot>. To understand the purpose of this tag lets go back to the app layout component again. The variable slot is the default one, we don’t need to define it, we can simply use it and the content of the view gets injected to it. But often we need to define other additional variables too, for example here an additional variable called header is used. And it makes sense , the header should look same in all the pages but the value of the header will vary.
<!DOCTYPE html>
<html lang="{{ str_replace('_', '-', app()->getLocale()) }}">
    <head>
        <meta charset="utf-8">
        <meta name="viewport" content="width=device-width, initial-scale=1">
        <meta name="csrf-token" content="{{ csrf_token() }}">

        <title>{{ config('app.name', 'Laravel') }}</title>

        <!-- Fonts -->
        <link rel="stylesheet" href="https://fonts.googleapis.com/css2?family=Nunito:wght@400;600;700&display=swap">

        <!-- Styles -->
        <link rel="stylesheet" href="{{ asset('css/app.css') }}">

        <!-- Scripts -->
        <script src="{{ asset('js/app.js') }}" defer></script>
    </head>
    <body class="font-sans antialiased">
        <div class="min-h-screen bg-gray-100">
            @include('layouts.navigation')

            <!-- Page Heading -->
            <header class="bg-white shadow">
                <div class="max-w-7xl mx-auto py-6 px-4 sm:px-6 lg:px-8">
                    {{ $header }}
                </div>
            </header>

            <!-- Page Content -->
            <main>
                {{ $slot }}
            </main>
        </div>
    </body>
</html>
In such a case, we have to use the tag <x-slot> to provide the content for this variable. Here inside the dashboard view, the variable’s name has been passed to the attribute name of the <x-slot> tag and the content to be injected to this variable is written inside the tags.
<x-app-layout>
    <x-slot name="header">
        <h2 class="font-semibold text-xl text-gray-800 leading-tight">
            {{ __('Dashboard') }}
        </h2>
    </x-slot>

    <!-- Content -->
    <div class="py-12">
        <div class="max-w-7xl mx-auto sm:px-6 lg:px-8">
            <div class="bg-white overflow-hidden shadow-sm sm:rounded-lg">
                <div class="p-6 bg-white border-b border-gray-200">
                    You're logged in!
                </div>
            </div>
        </div>
    </div>
</x-app-layout>
Now the next questions may be- Why this name <x-app-layout>, for the tag? Do we need to use this name always while defining a component for a page layout? Do we have more similar types of tags for different types of components?
-We don’t need to use this same name always, there are no pre-defined tags for different components. These names are derived from the name of the component, they start with the string x- followed by the kebab case name of the Component class. In kebab case the words are separated by hyphens. So if you create a component named ProductCard then to render that component inside your view you have to user the tag x-product-card. And the tag <x-slot> is pre-defined in Blade, we have to use it define slots apart from the main content.
Now, more confusion!!!. As the tag used inside dashboard view is <x-app-layout>, there should be a component named AppLayout, right! But the file we were looking at is app.blade.php. So is there any exception?
-Well, not an exception actually. There are basically two types of Components – 1. Class based and 2. Anonymous. To create an anonymous component we simply need to keep the Blade Template for the component inside this folder named component inside the folder views, inside resources. And we can start using a tag with same naming convention as mentioned before to render this component. Take a look inside this folder components, a number of anonymous components have been kept here by Laravel Breeze while implementing authentication. Here the first one is named application-logo.blade.php this is a simple component containing the svg of the Laravel logo, which is being used by the authentication related views. And inside the file navigation.blade.php inside the resources/views/layouts folder you find the usage of a tag <x-application-logo> that is responsible for rendering this component. Now you may ask, how do I know that application-logo is an anonymous component!!!!! I’ll tell you, first let me tell you about the first type – class-based components. Class based components have an associated class that gets placed inside the folder named Components inside View inside the app folder (app/View/Components). A class based component can be created by running the command – php artisan make:component ComponentName on the terminal. It will place a component in the app/View/Components directory and it will also create a view template for this component and place it inside the resources/views/components directory. Now if you take a look inside this Component folder , inside app/Views , you’ll find two files containing the classes for the corresponding components. And the views for the components are app.blade.php and guest.blade.php that are inside resources/views/layout folder*. *****By default the views are created by the make:component command are kept inside the Components folder but here these views are kept inside the layout folder by explicitly specifying this inside the classes. So currently we have two class based components AppLayout and GuestLayout and the other component that are inside the folder resources/View/Component are anonymous Components. So you have got the answer to the question how do I know that application-logo is an anonymous component.
Now with all the knowledge that we have acquired let us create our own component. Can you decide the steps that we shall take now:
- First, we shall create a component
- We shall add the code for the header and the footer in this component and we’ll remove them from our views
- And we shall wrap the remaining code of our views inside the component’s tags
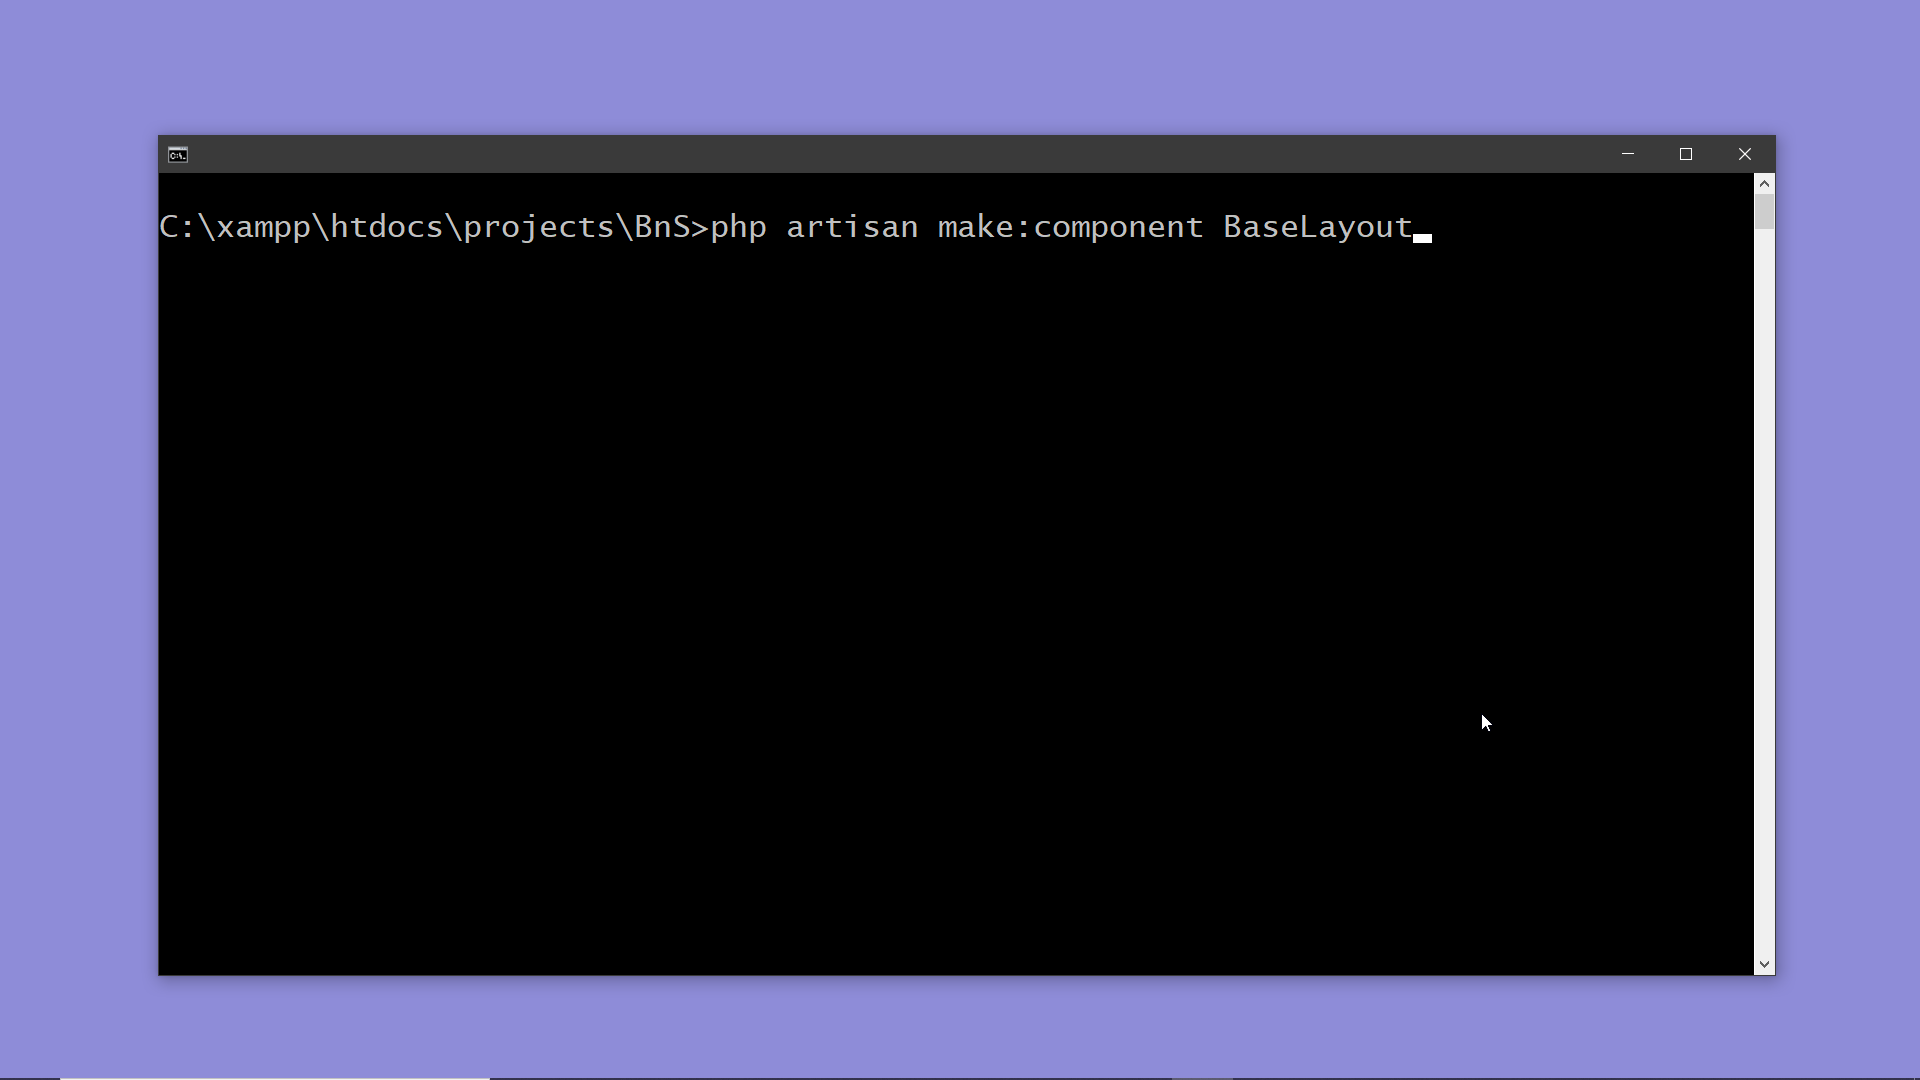
Step 1: Run the command php artisan make:component and specify a name, let name it (like BaseLayout)
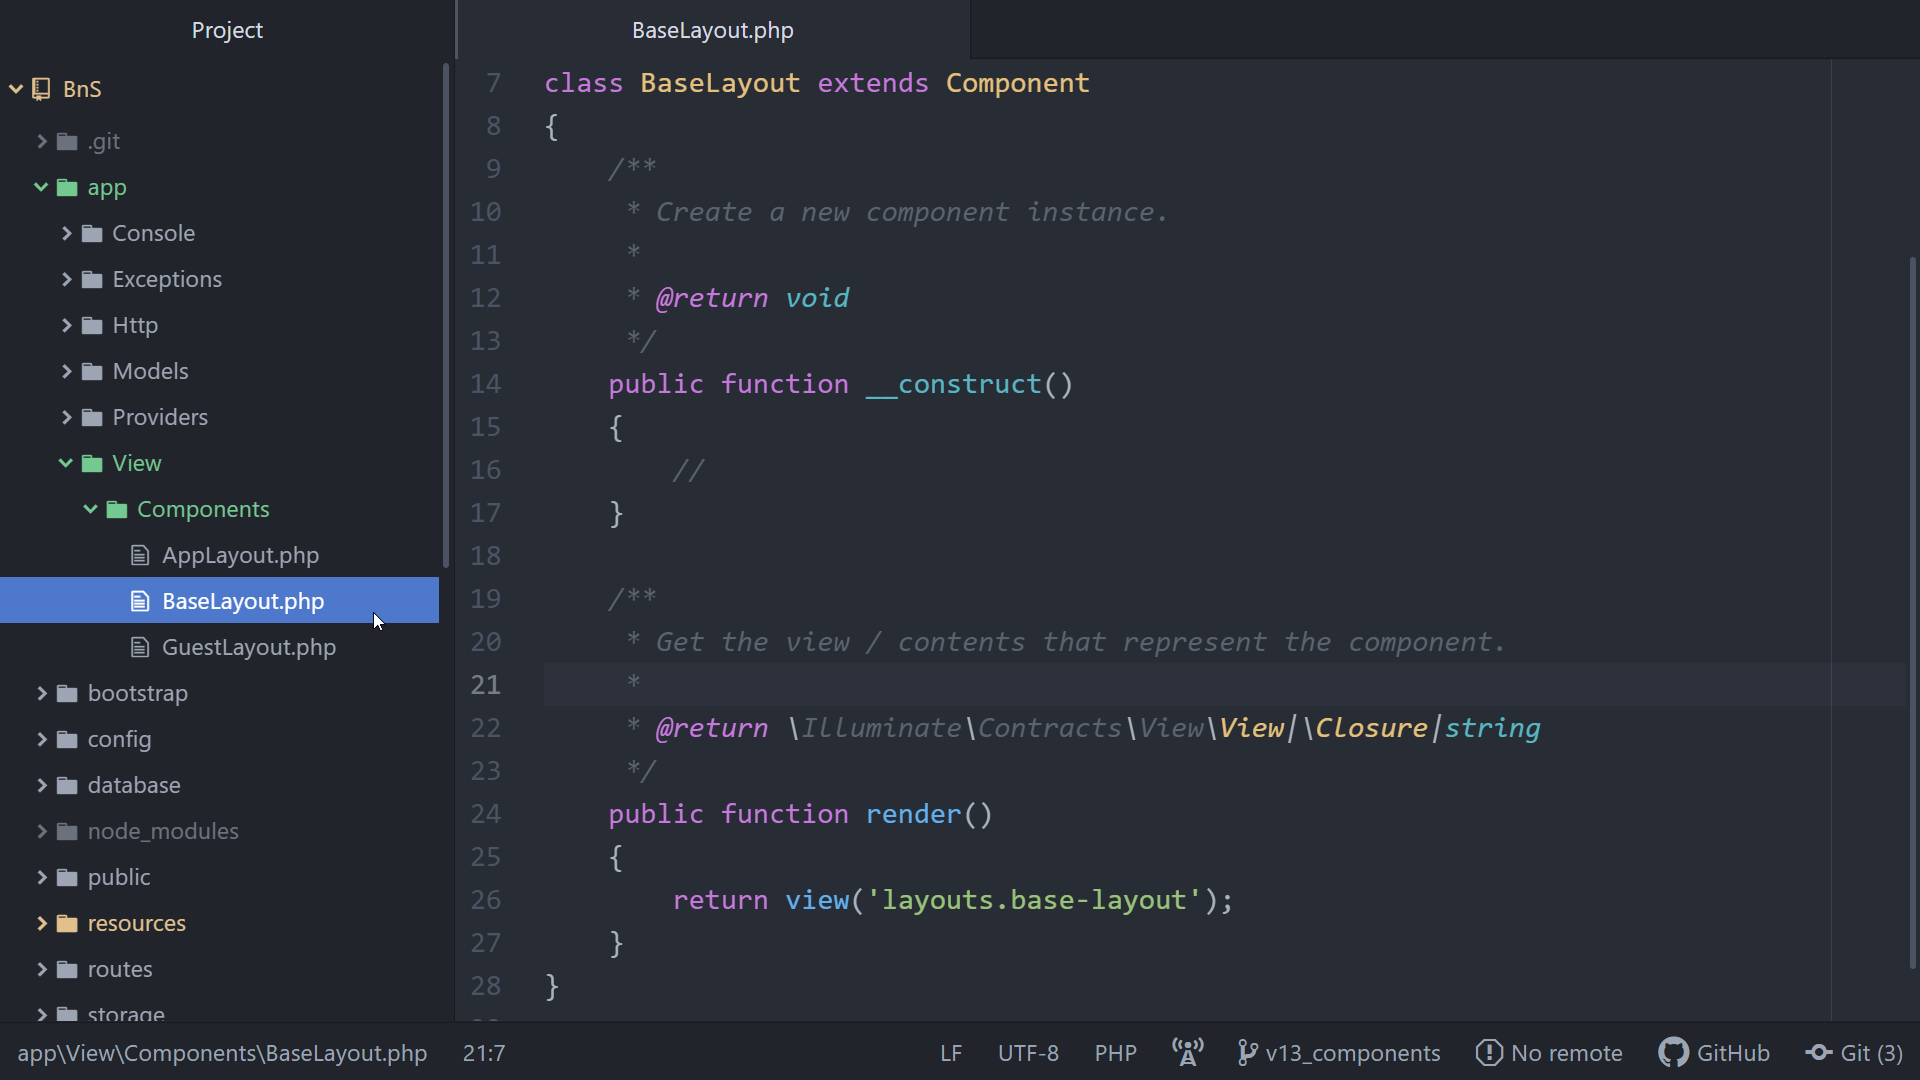
Step 2: Now notice that a new file has been added inside the folder app/Views/Components for the component class and the corresponding view named base-layout.blade.php inside the folder resources/Views/Components.
Step 3: Let’s move this new view to the layouts folder to maintain a similar structure to the one created by Laravel Breeze. We also have to update the view reference inside the render() function of the component class.
Step 4: Now copy the code from the view products.blade.php or from the product.blade.php and paste it here inside the base-layout view. Remove the main-content portion of code, and echo the variable slot. Now the main content for the individual pages will be injected into this variable.
Step 5: Now come back to the products view, and remove all the code except the code for the main-content portion. And wrap this code by the tag for rendering the component, <x-base-layout>.
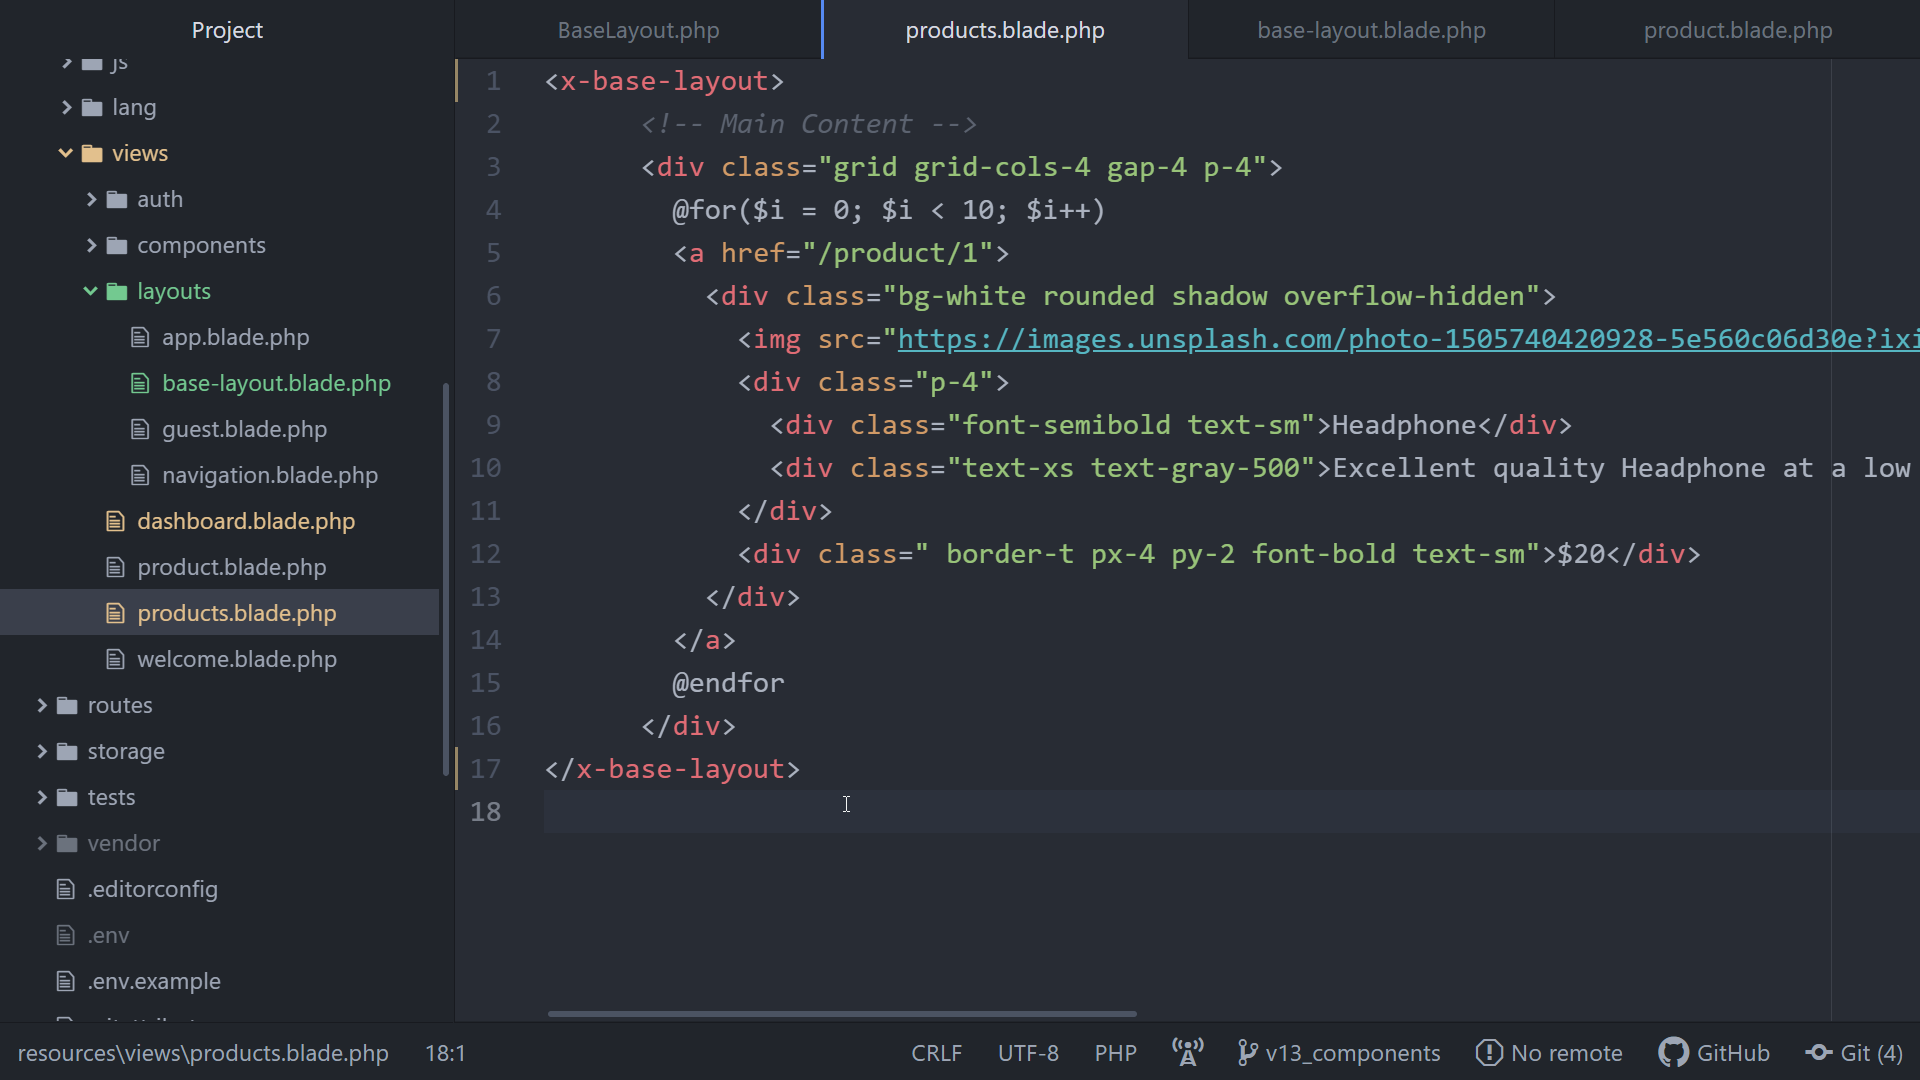

If we reload the website on the browser we’ll see that it looks and behaves the same as before. Now try removing the tags <x-base-layout> once and reload the page again, this time you will notice that the header and the footer disappeared, and the styles applied to the elements of the product card are also not working as the link to the CSS file is there inside the base-layout component.
Step 6: Let’s make it work again by adding the tag and also do the same for the product details page. Inside the product view remove all the code other than the main content portion and enclose this remaining code inside the tags <x-base-layout>.
<x-base-layout>
<!-- Main content -->
<div class="flex m-4">
<!-- Left half -->
<div class="w-1/2 rounded overflow-hidden shadow">
<img class="object-cover w-full" src="https://images.unsplash.com/photo-1505740420928-5e560c06d30e?ixid=MnwxMjA3fDB8MHxzZWFyY2h8Mnx8cHJvZHVjdHxlbnwwfHwwfHw%3D&ixlib=rb-1.2.1&auto=format&fit=crop&w=600&q=60"/>
</div>
<!-- Right half -->
<div class="w-1/2 rounded bg-white ml-2 p-6 shadow relative">
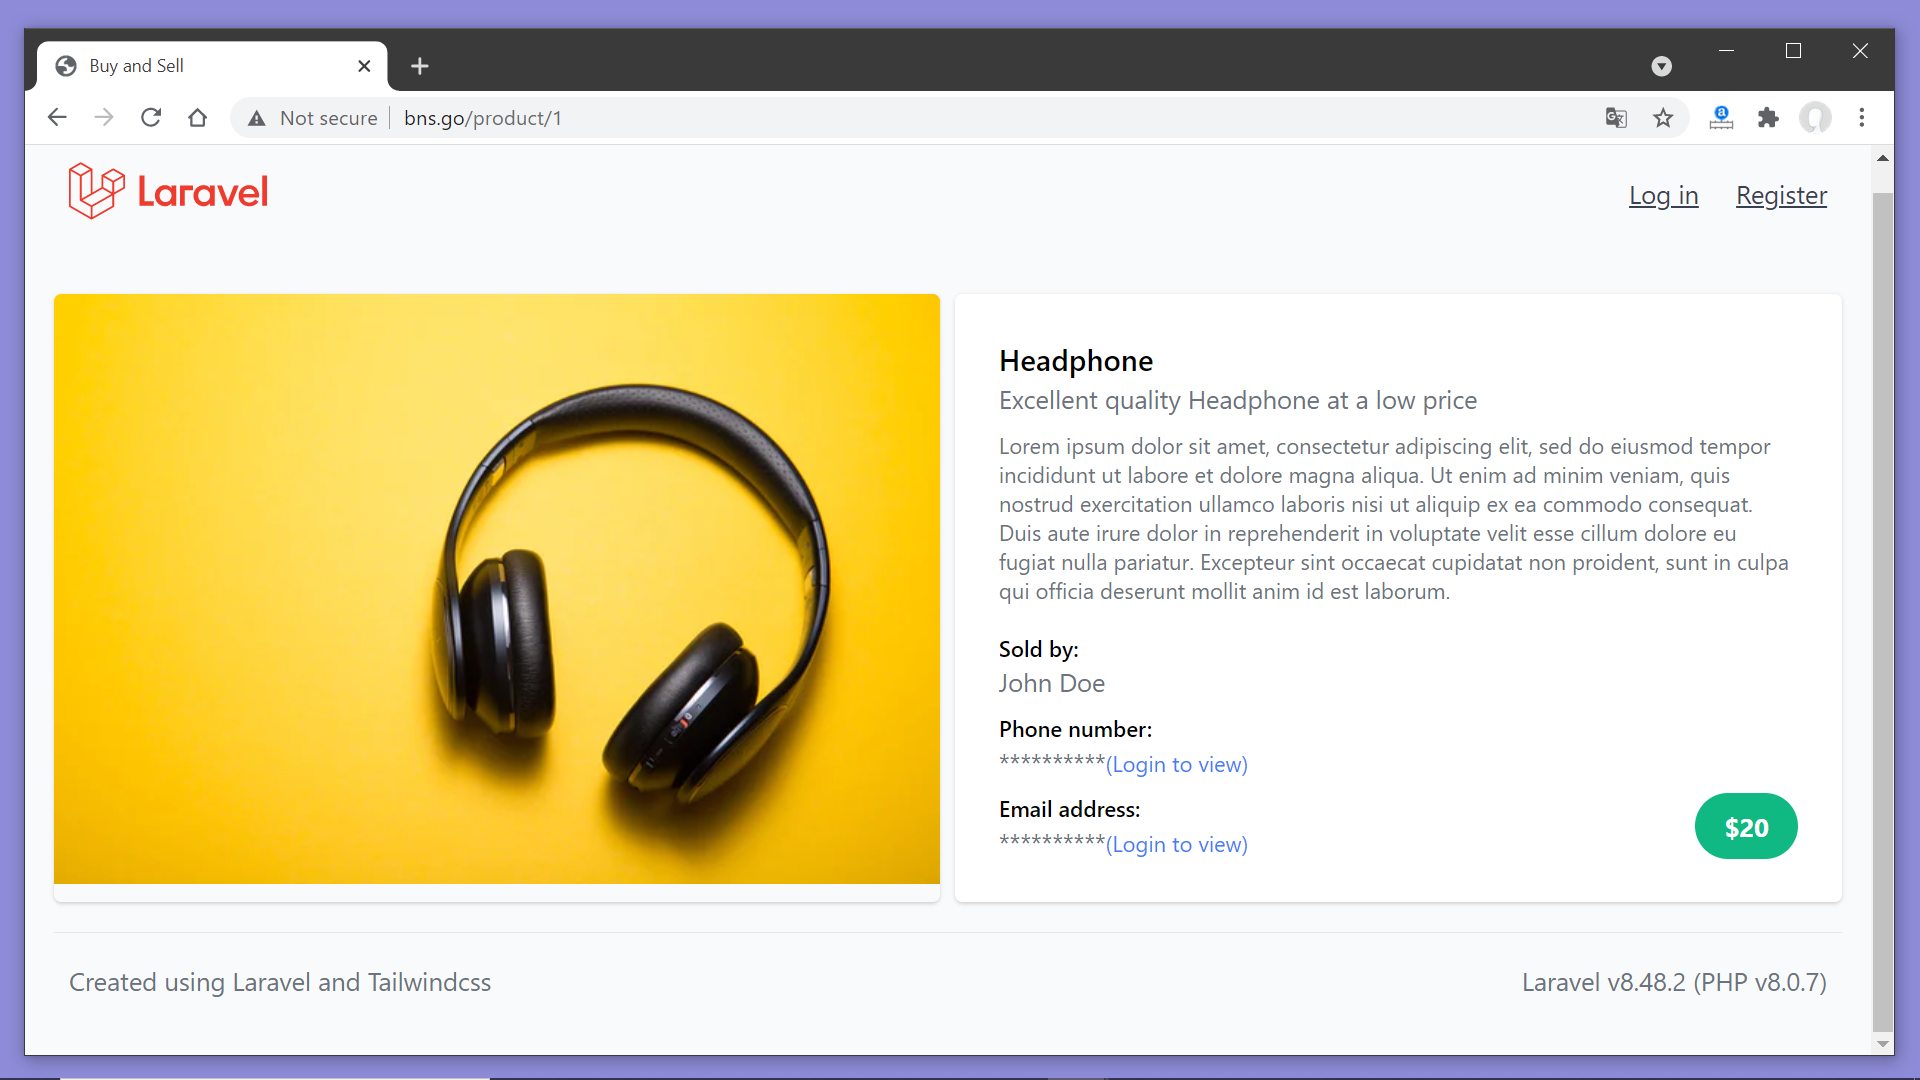
<div class="font-semibold">Headphone</div>
<div class="text-sm text-gray-500">Excellent quality Headphone at a low price</div>
<div class="text-xs text-gray-500 mt-2">Lorem ipsum dolor sit amet, consectetur adipiscing elit, sed do eiusmod tempor incididunt ut labore et dolore magna aliqua. Ut enim ad minim veniam, quis nostrud exercitation ullamco laboris nisi ut aliquip ex ea commodo consequat. Duis aute irure dolor in reprehenderit in voluptate velit esse cillum dolore eu fugiat nulla pariatur. Excepteur sint occaecat cupidatat non proident, sunt in culpa qui officia deserunt mollit anim id est laborum.</div>
<!-- Seller Information -->
<div class="mt-4">
<div class="text-xs text-gray font-semibold">Sold by:</div>
<div class="text-sm text-gray-500">John Doe</div>
</div>
<div class="mt-2">
<div class="text-xs text-gray font-semibold">Phone number:</div>
@auth
<div class="text-sm text-gray-500">012356789</div>
@else
<div class="text-sm text-gray-500">**********<a href="/login" class="text-xs text-blue-500">(Login to view)</a></div>
@endauth
</div>
<div class="mt-2">
<div class="text-xs text-gray font-semibold">Email address:</div>
@auth
<div class="text-sm text-gray-500">abc@example.com</div>
@else
<div class="text-sm text-gray-500">**********<a href="/login" class="text-xs text-blue-500">(Login to view)</a></div>
@endauth
</div>
<!-- Product Price -->
<div class="absolute bottom-0 right-0 bg-green-500 px-4 py-2 m-6 rounded-full">
<div class="text-white font-bold text-sm">$20</div>
</div>
</div>
</div>
</x-base-layout>Step 7: Now along with the UI our code too looks good. With help of Blade’s superpowers we have made our code more maintainable, and more scalable.
The next thing we have to do is to create the sale-product view, to allow the user to post a new ad to sell a product.