Watch the video course on Creating a Buy & Sell website using Laravel 8.
Intro: You know my email, right! So you can create an account on our website and keep on using the features. Basically, anyone can create an account with anyone else’s email and post ads. But this is not good. So to prevent such incidents from happening we should verify the emails using which the accounts are created. And as we are using Laravel Breeze to set up authentication, most of the work is already done. With some minor configurations, our email verification system will be up for work.
Steps:
1. First, ensure that the model User implements the class MustVerifyEmail. Open the file User.php from the folder app/Models, and if it doesn’t already implement MustVerifyEmail then implement it.. class User extends Authenticatable implements MustVerifyEmail { }
2. Add the middleware named ‘verified’ to the dashboard route.Route::get('/dashboard', [ProductsController::class,'showOwnProducts'] )->middleware(['auth','verified'])->name('dashboard');
3. Add the email-related configurations.
Open the .env file and find the email-related configuration. For this course, I’ll show you how to send emails from your Gmail account, but in production, you’ll probably use one of the many popular email services.
Now let’s add the configuration to enable our BuyAndSell website to send email using a Gmail account.MAIL_MAILER=smtp MAIL_HOST=smtp.gmail.com MAIL_PORT=587 MAIL_USERNAME=sender_email@example.com MAIL_PASSWORD=....... MAIL_ENCRYPTION=tls MAIL_FROM_ADDRESS=sender_email@gmail.com MAIL_FROM_NAME="${APP_NAME}"

4. You’ll also have to make some changes to your google accounts security settings. Go to this page https://myaccount.google.com/lesssecureapps , and you’ll find a switch called “Allow less secure apps”, turn it on….. at least for the time. When you’ll push it to production, then you’ll probably use one of the different available SMTP services.
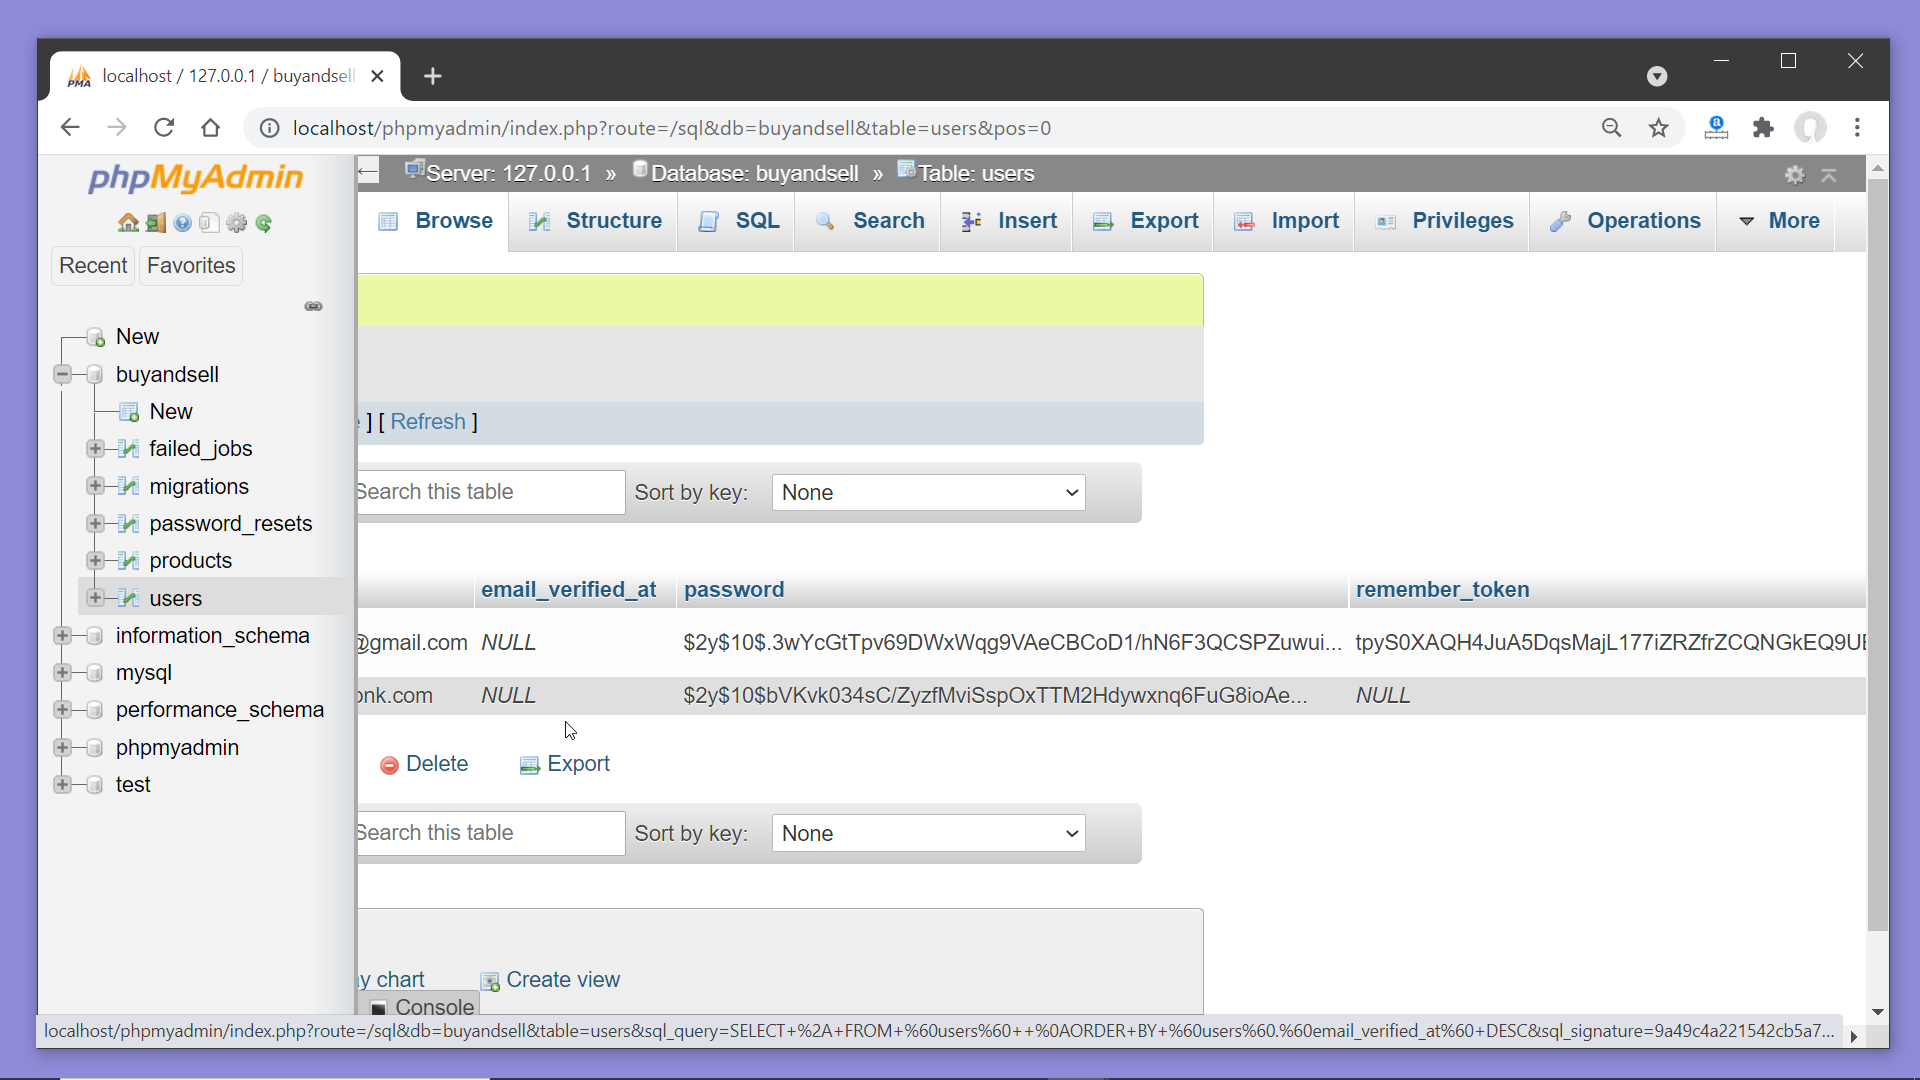
5. Now before you test the functionality, take a look at the users table on the database once. Notice the values of the column ’email_verified_at’. Currently, the values for this column are null, once we get our emails verified we’ll come back here to see if anything changes.
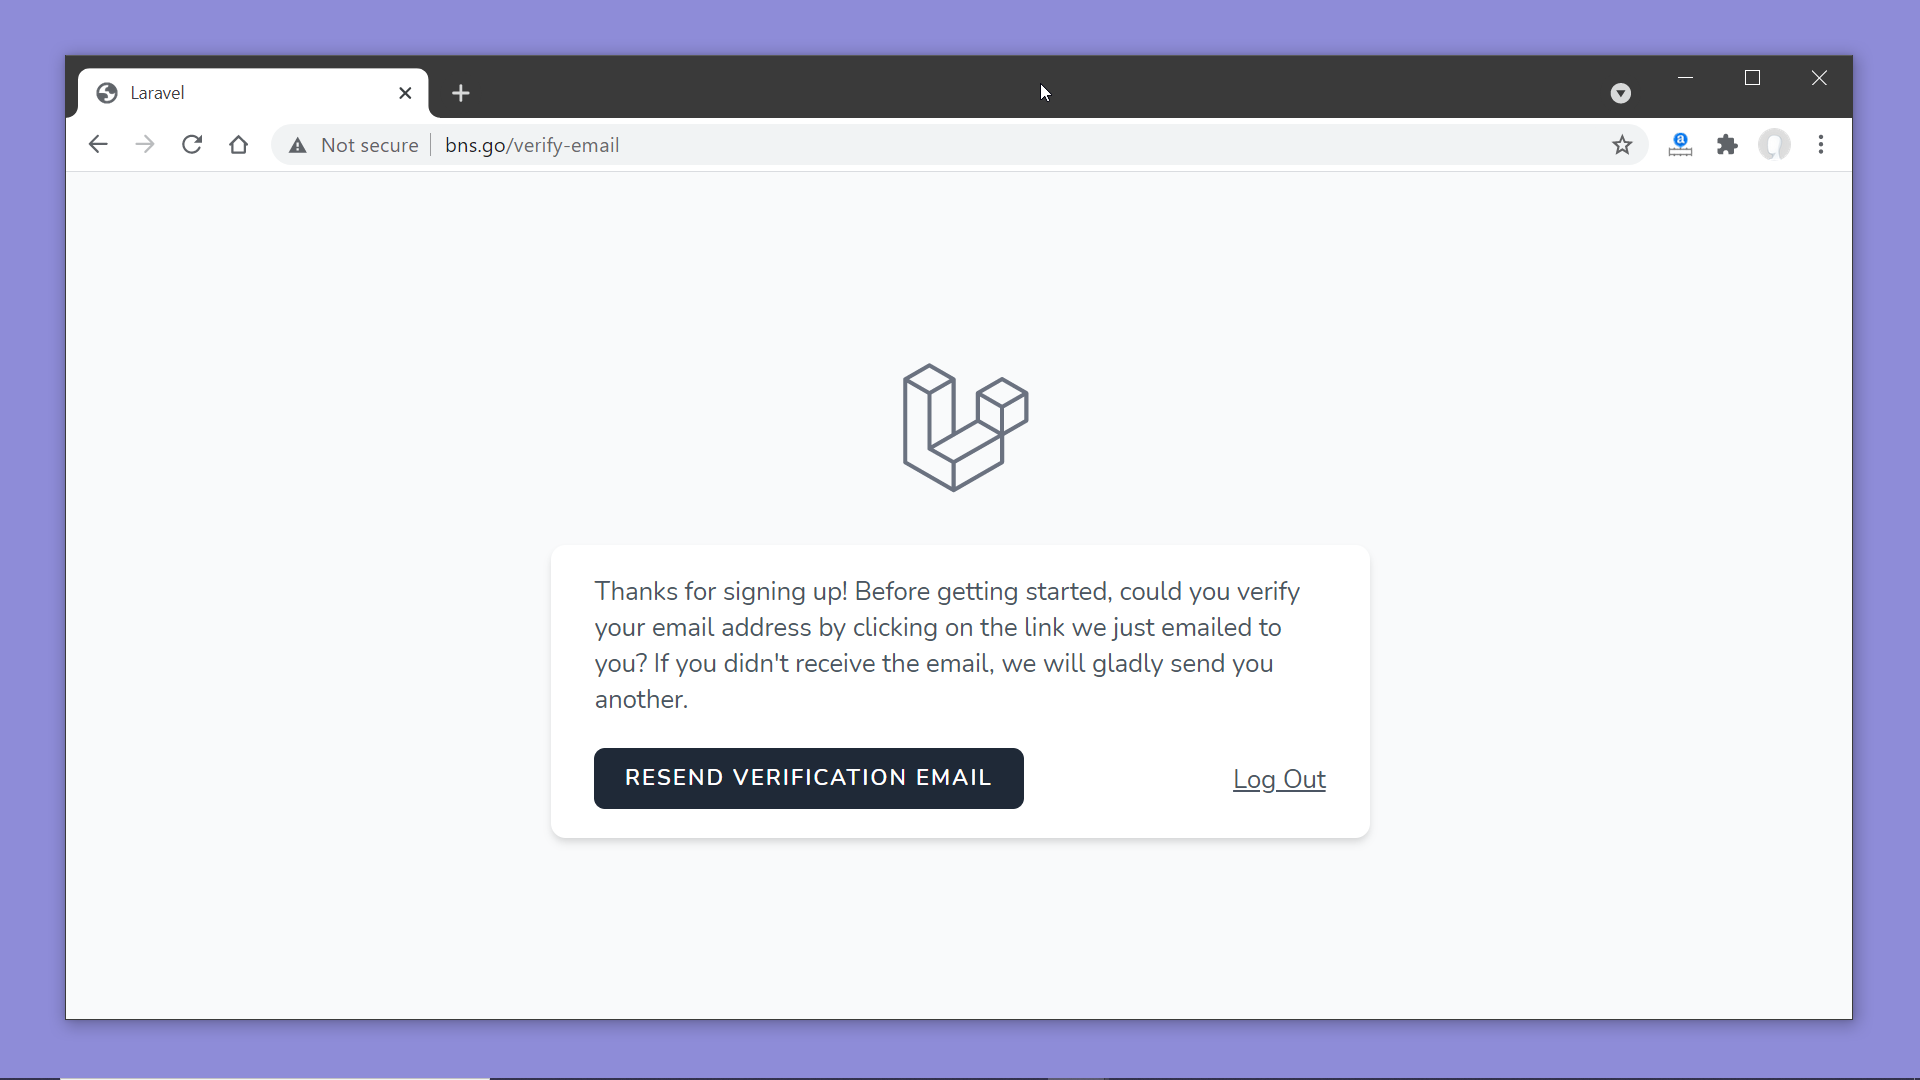
6. Now try to access the dashboard page. You will see something like this, the message may look a little different depending on whether an email has already been sent before, or being sent for the first time.
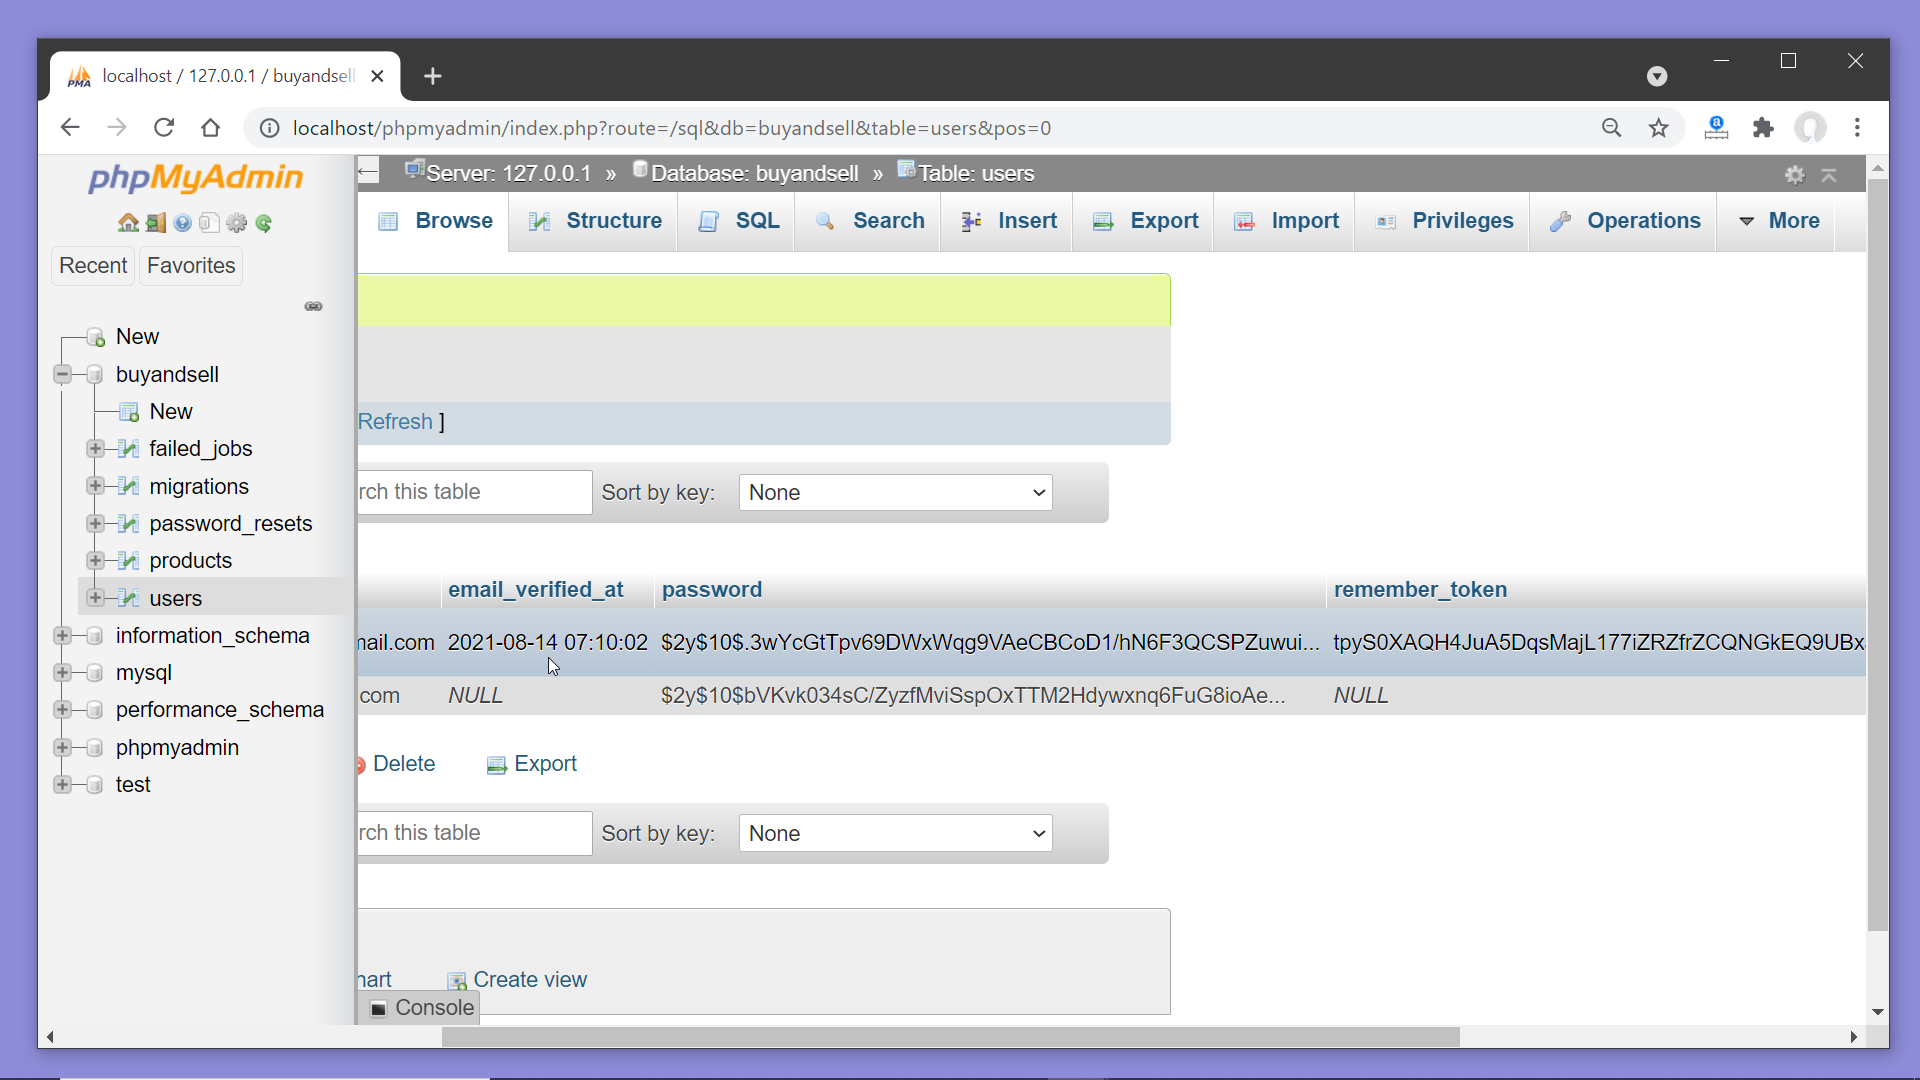
Now check your inbox, you should have got an email with a link to verify the email. Click on the links, and you’ll redirected to the dashboard page. So your email has been verified. Now take a look at the users table on phpMyAdmin again. You’ll notice the timestamp when the email got verified in the corresponding row for the column email_verified_at.
Conclusion: Now no one can access the dashboard page by creating an with someone else’s email. You can add the middleware ‘verified’ to all the routes to which you don’t want to allow access unless the email is verified. I’ll add it to the route ‘sell’ too, remember that you have use an array to apply more than one middleware to a route.
Route::get('/sell',function(){ return view('sell'); })->middleware(['auth','verified']);