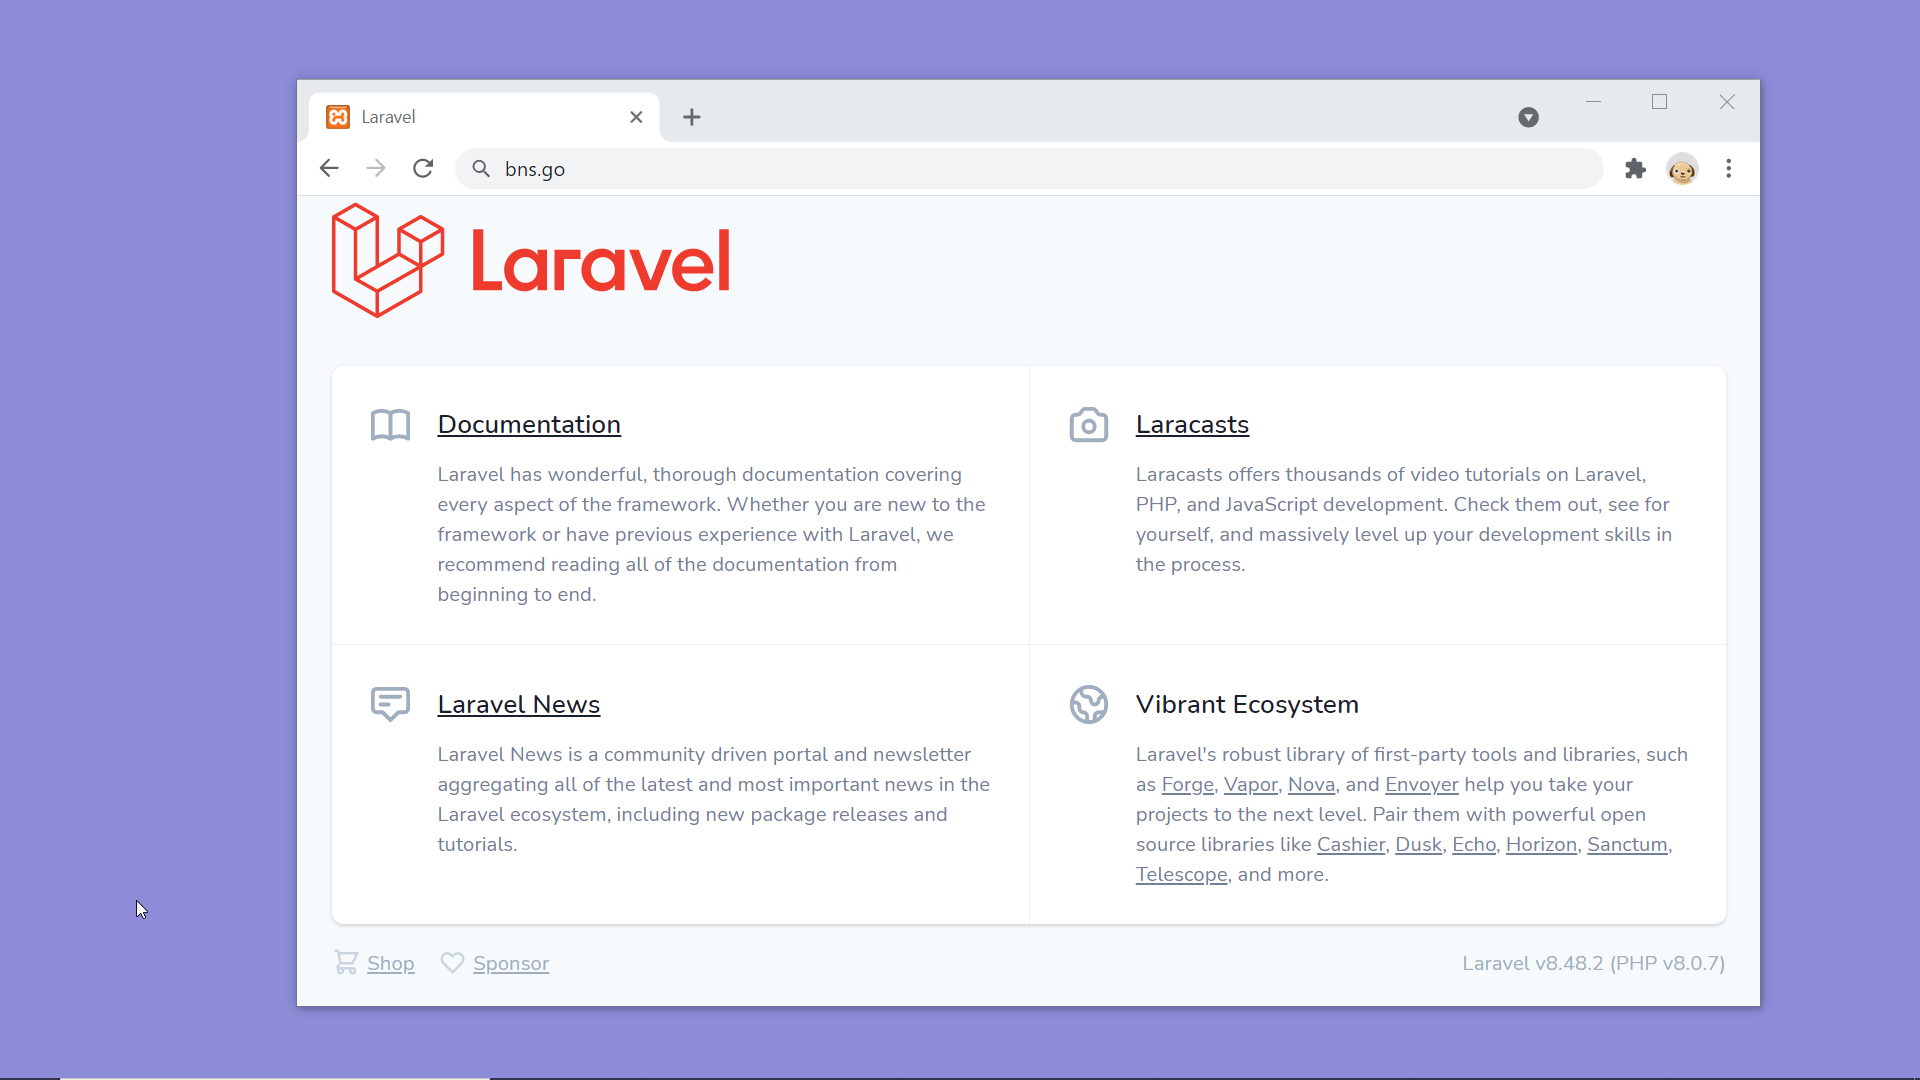
In this lesson, I’ll show you how to add a virtual host, but what will happen after adding a virtual host? Let me show you ….this will happen We shall be able to access our website using a domain name like this one bns.go, and it is convenient than typing localhost/projects/BnS/public everytime.
We have to make changes in two files.
- One is inside the XAMPP installation directory
- and the other is inside the Operating Systems, Windows directory
Let us find the first file, Go to XAMPP installation folder→ apache→ conf→ extra Here you’ll find a file named httpd-vhosts.conf Inside this file you will find some sample information inside blocks named VirtualHost which are currently commented by adding # at the beginning.
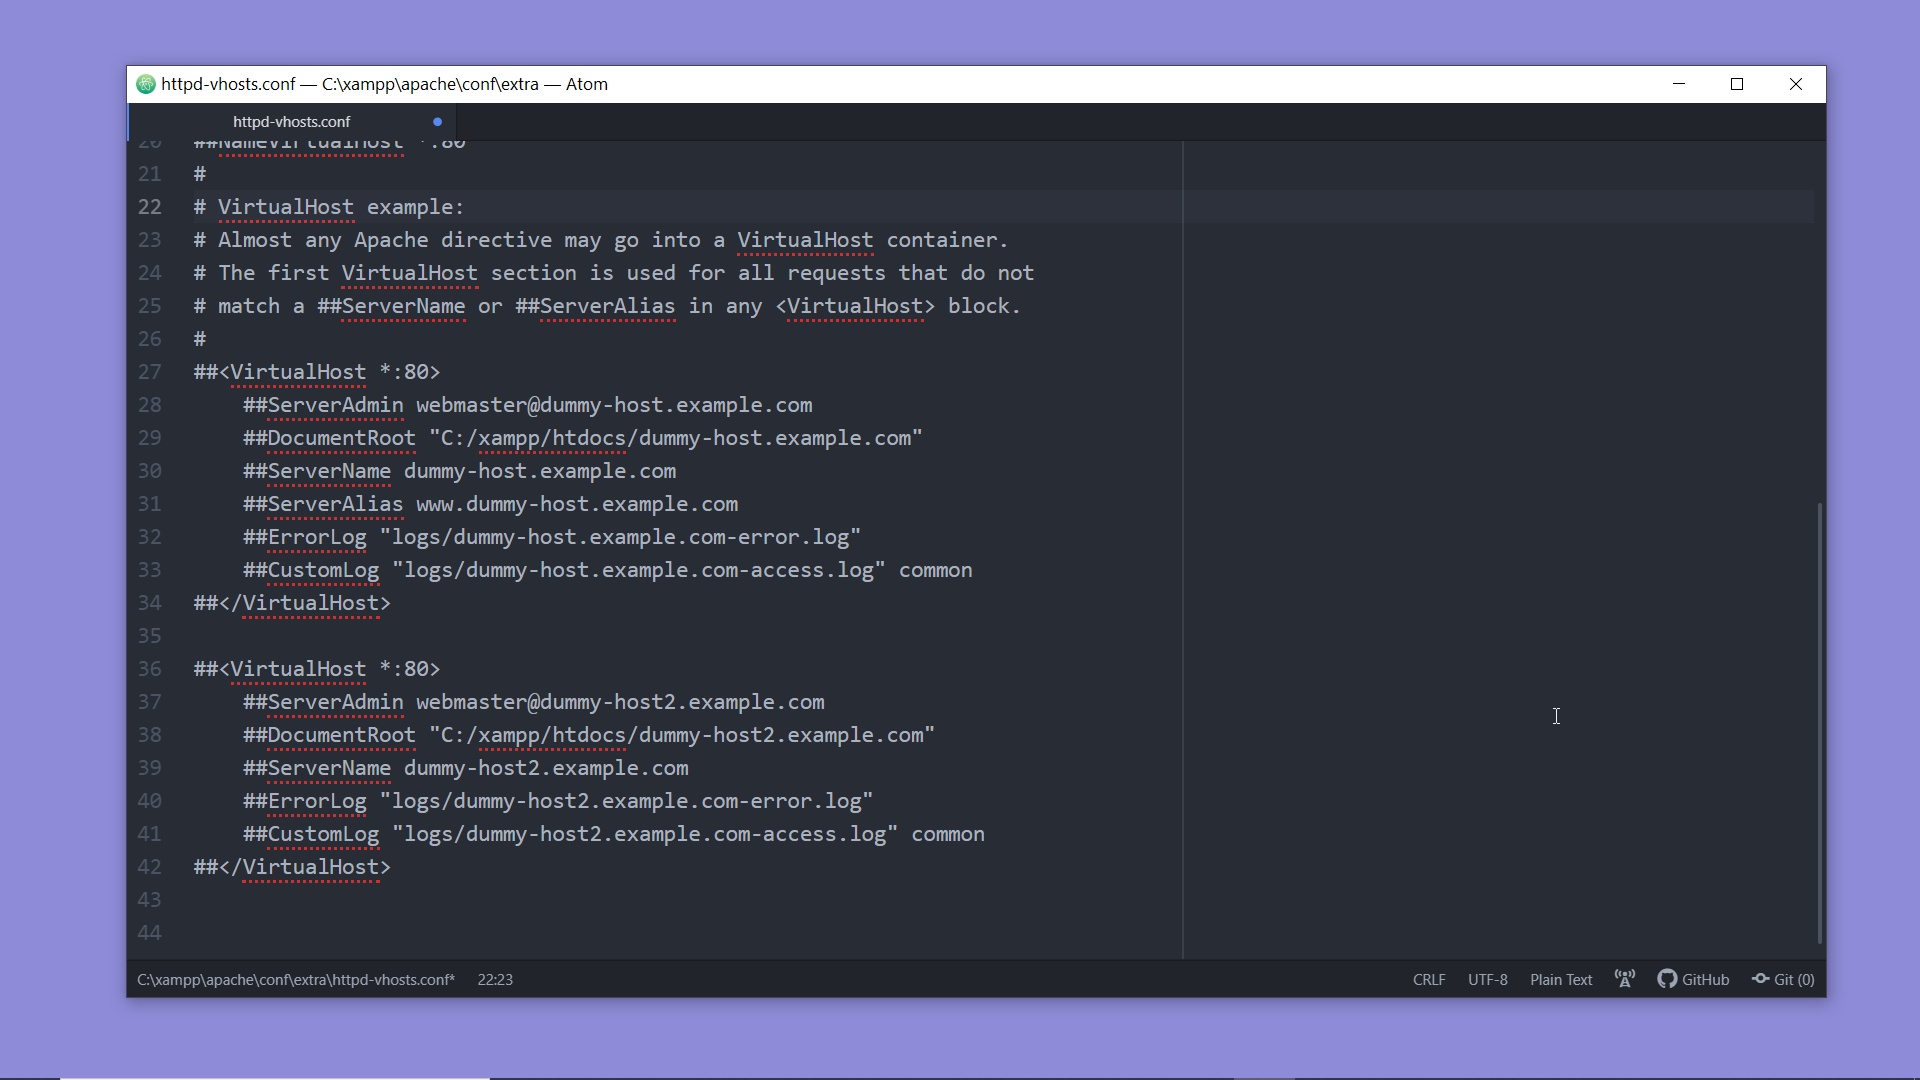
We shall add a new VirtualHost block here, we shall add values for two properties here. First is the DocumentRoot, we shall add the path of the public directory of our Laravel project here. And we shall specify a ServerName by which we want to access our website. So let’s add bns.go here.
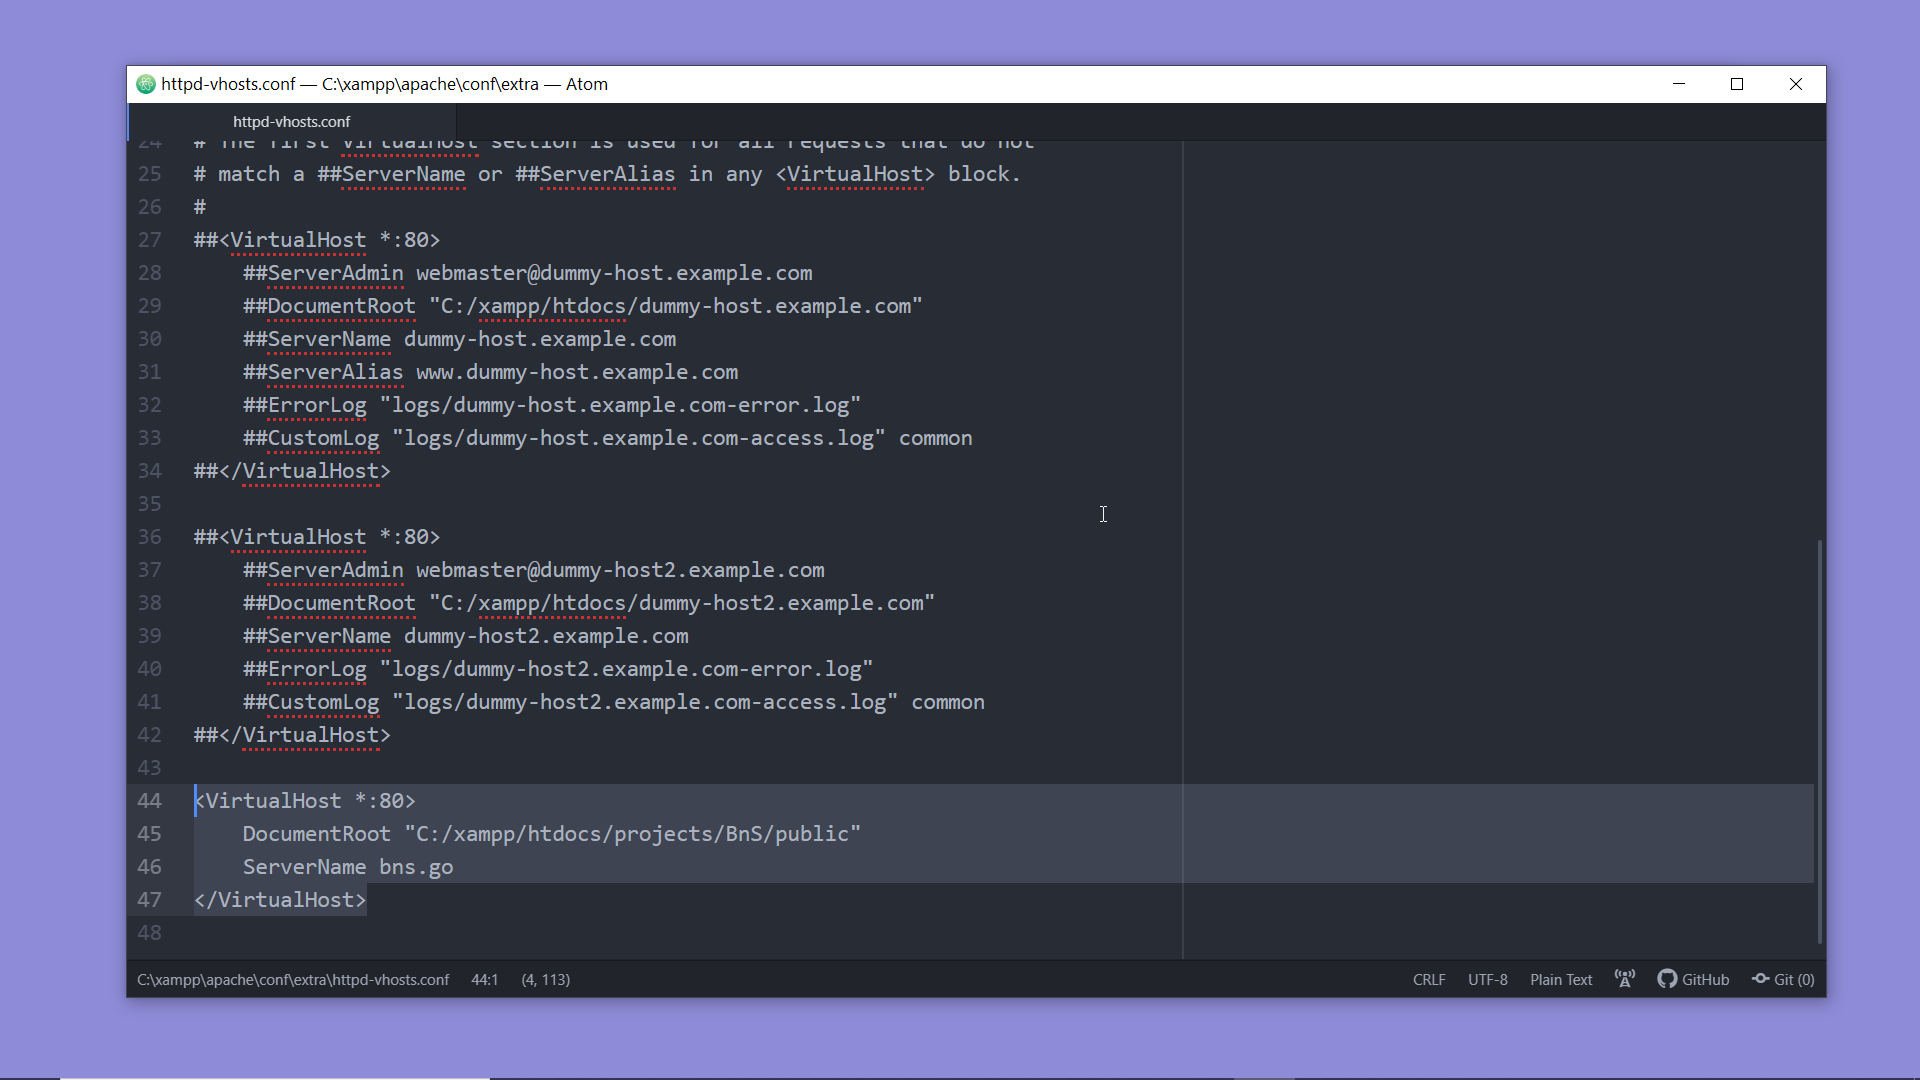
Let us add one more to load the default XAMPP dashboard page on by the name localhost.

We are done with the required changes in this file, lets move to the second file that I have mentioned earlier. For that, we have to go to the C:\Windows\System32\drivers\etc, and here we will find a file named hosts, we will make some changes to this file. But we have to do that as an administrator. So let’s open notepad as administrator and open this file.
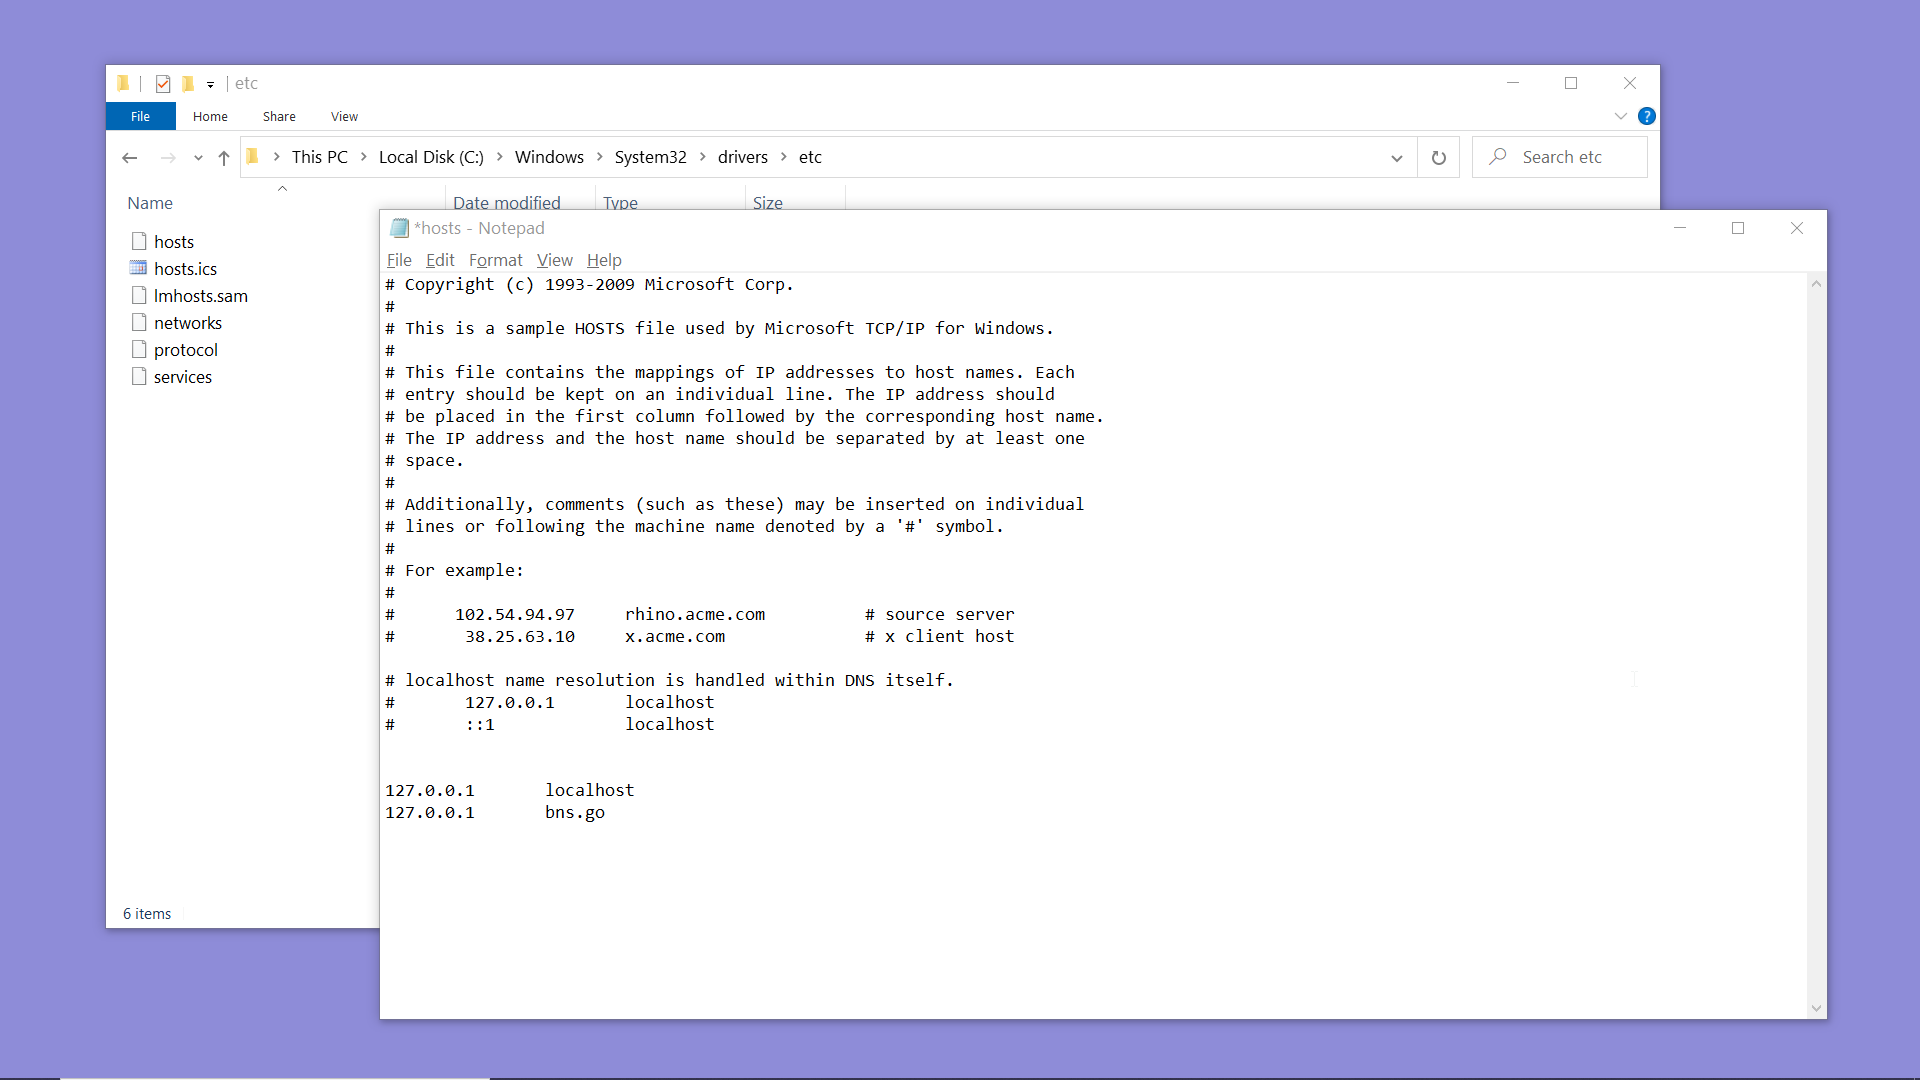
And add these two lines here to map the local IP address to the domain names we want to use.
127.0.0.1 localhost 127.0.0.1 bns.go
We have to add the IP address , add a space or a tab and the domain name. And we have already specified the directories to which these domain should point to, right!.
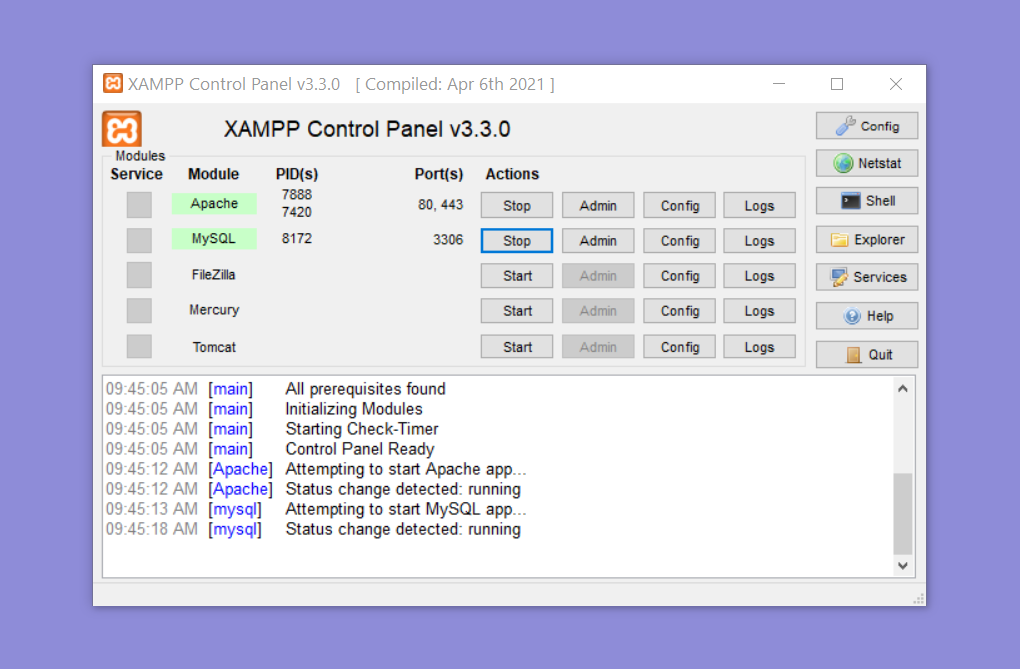
Now, restart the apache webserver from the XAMPP control panel and try typing the domain name on the browser’s address bar. http://bns.go And it loads the home page of our Laravel project.

Now, we are all set to start writing the code. So open up your favorite IDE, I’ll be using ‘Atom’ for this class which you can get from the website https://atom.io/ .
