We have created the view for the products list, but it displays static content; we have created the view for the details of the product, but it too displays some dummy content as we have not added any product to the database. We have created the form to post an ad for a product but we have not yet written the code to insert the product into the database. We shall do that now –
- First, we shall create a migration to create a table for the product ads.
- We shall create a Model to interact with the database.
- Then we shall create a controller to handle the HTTP requests.
- And finally, we shall create a route to make the request to submit the data to the database.
In this video, I will show you the first two steps – Creating a database migration and Creating a Model, we shall run the migration after writing it. So by the end of this video, we shall have a new table in our database to store the product ads. Let’s get started.
Step 1: We can create a migration with help of this artisan command – php artisan make:migration descriptive_migration_name
This will add a migration file named descriptive_migration_name inside the folder database/migrations .
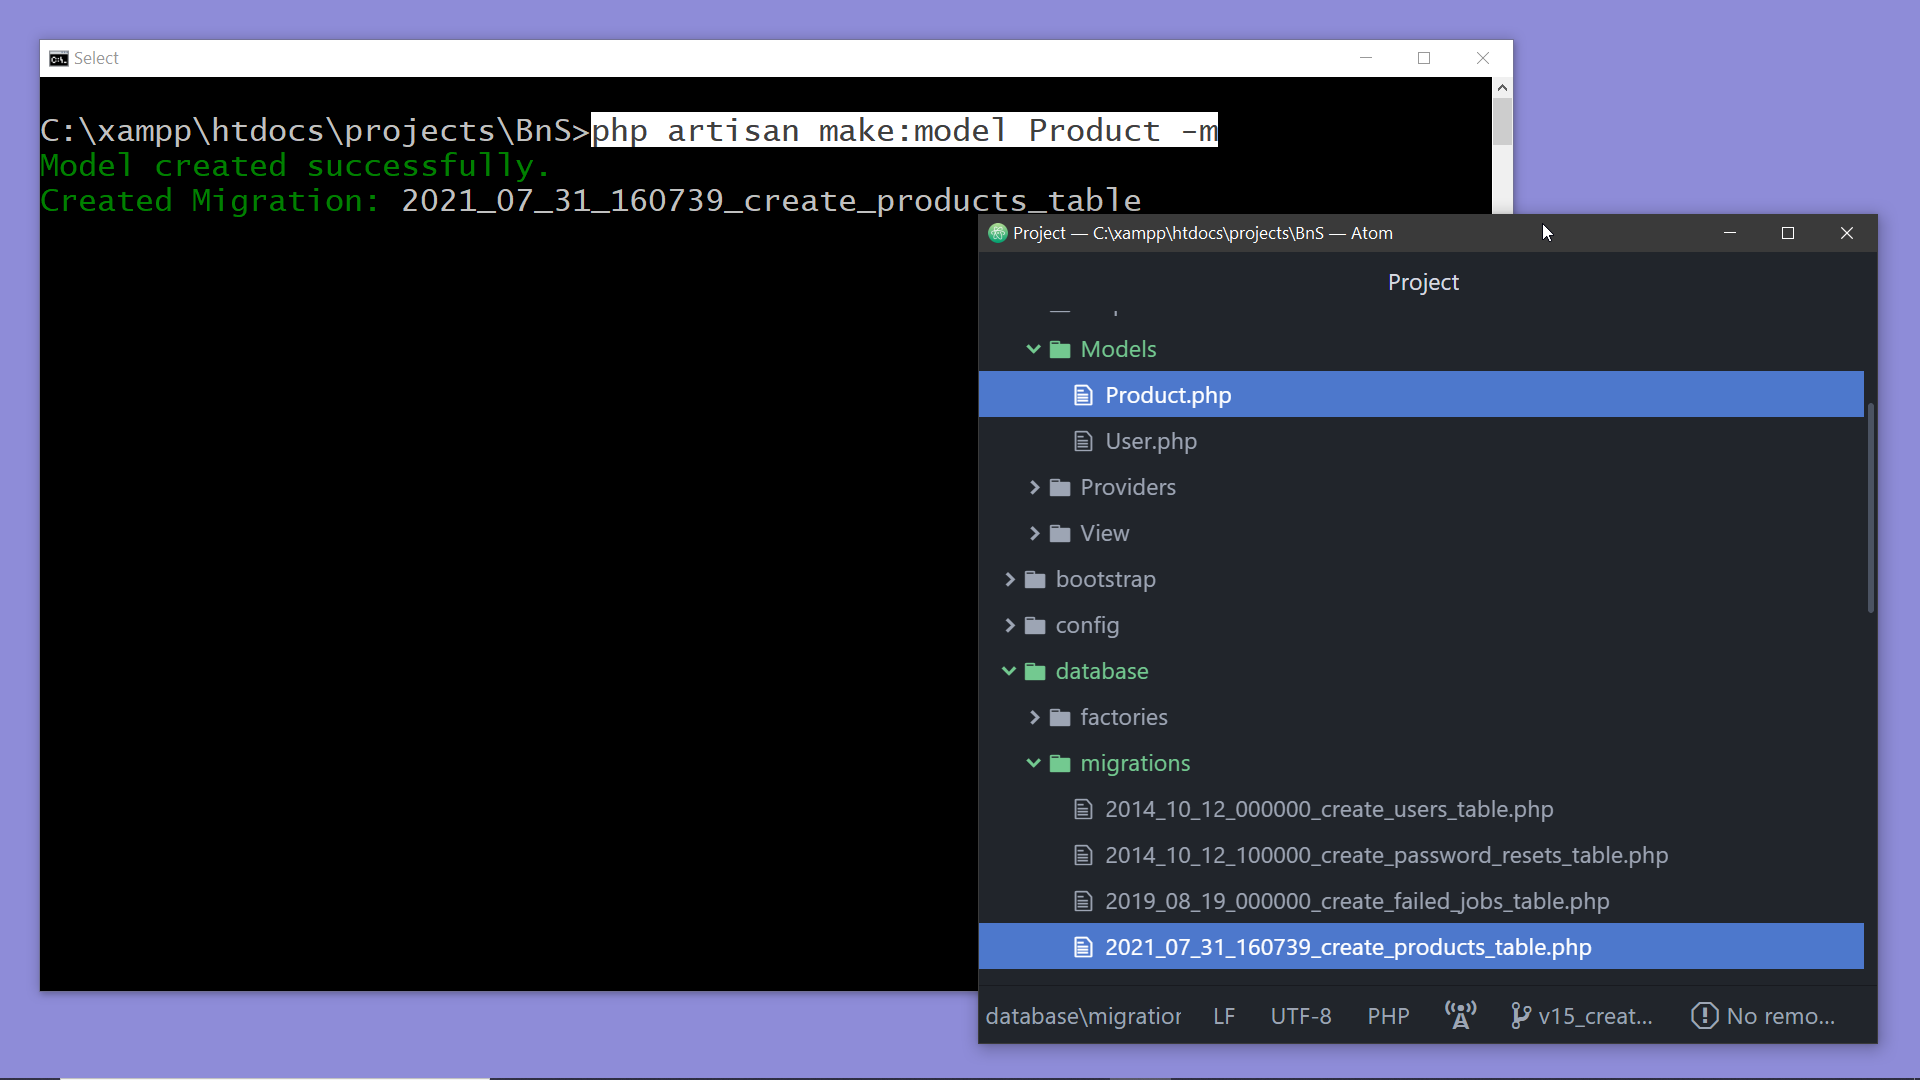
We can also create a migration while creating a Model. The command for creating a Model is- php artisan make:model Product
If we add -m to this command it will create a migration along with the model. Let’s try this; we are going to create a model to represent an ad for a product or we can say to represent a product, so let’s name it Product – php artisan make:model Product -m
Now we can see that a new file named Product.php has been added to the folder app/Models. We shall take a look inside this file later, for now, let’s focus on the other file added inside the folder database/migrations. Notice the name of the file, this automatically created name too explains the purpose of the file.
Step 2: Now we have to define the schema for the table products where we shall be storing the information of the products. A class for a migration extends the class Migration. And as we have explored earlier a migration contains two functions up and down. We shall write the schema inside the up() function, and we’ll drop the table inside the down() function. To define the schema for the products table we shall use the schema builder Schema. To create a table we have to use the function create() of the schema builder and to drop a table we have to call dropIfExists() as we can see in the default code. We have to pass two arguments to the create() function –
-First is the name of the table. Here as this migration got created along with the model Product, by convention, the plural form of the model’s name is added as the name of the table.
-And the second parameter is a function that gets an instance of the class Blueprint that can be used to define the fields of the table. Two fields are defined by default in the existing code. Now let us add the other fields for the products table.

Step 3: This Blueprint class has different functions corresponding to the different types for the columns. We shall add a column of type string for the product title, so let’s call the function $table→string() and pass the name of the column to it. We have to create a few more columns,
- one of type string for the short description,
- one for the long description,…… this description may get a little longer so let’s call longText() instead of the function string(),
- one more string type column for the product price
- and finally, let’s create a column to hold the user id of the seller, we shall make it bigInteger and name the column user_id (There is a reason behind this name, that I will tell you later).
<?php
use Illuminate\Database\Migrations\Migration;
use Illuminate\Database\Schema\Blueprint;
use Illuminate\Support\Facades\Schema;
class CreateProductsTable extends Migration
{
/**
* Run the migrations.
*
* @return void
*/
public function up()
{
Schema::create('products', function (Blueprint $table) {
$table->id();
$table->timestamps();
$table->string('title');
$table->string('short_desc');
$table->longText('long_desc');
$table->string('price');
$table->bigInteger('user_id');
});
}
/**
* Reverse the migrations.
*
* @return void
*/
public function down()
{
Schema::dropIfExists('products');
}
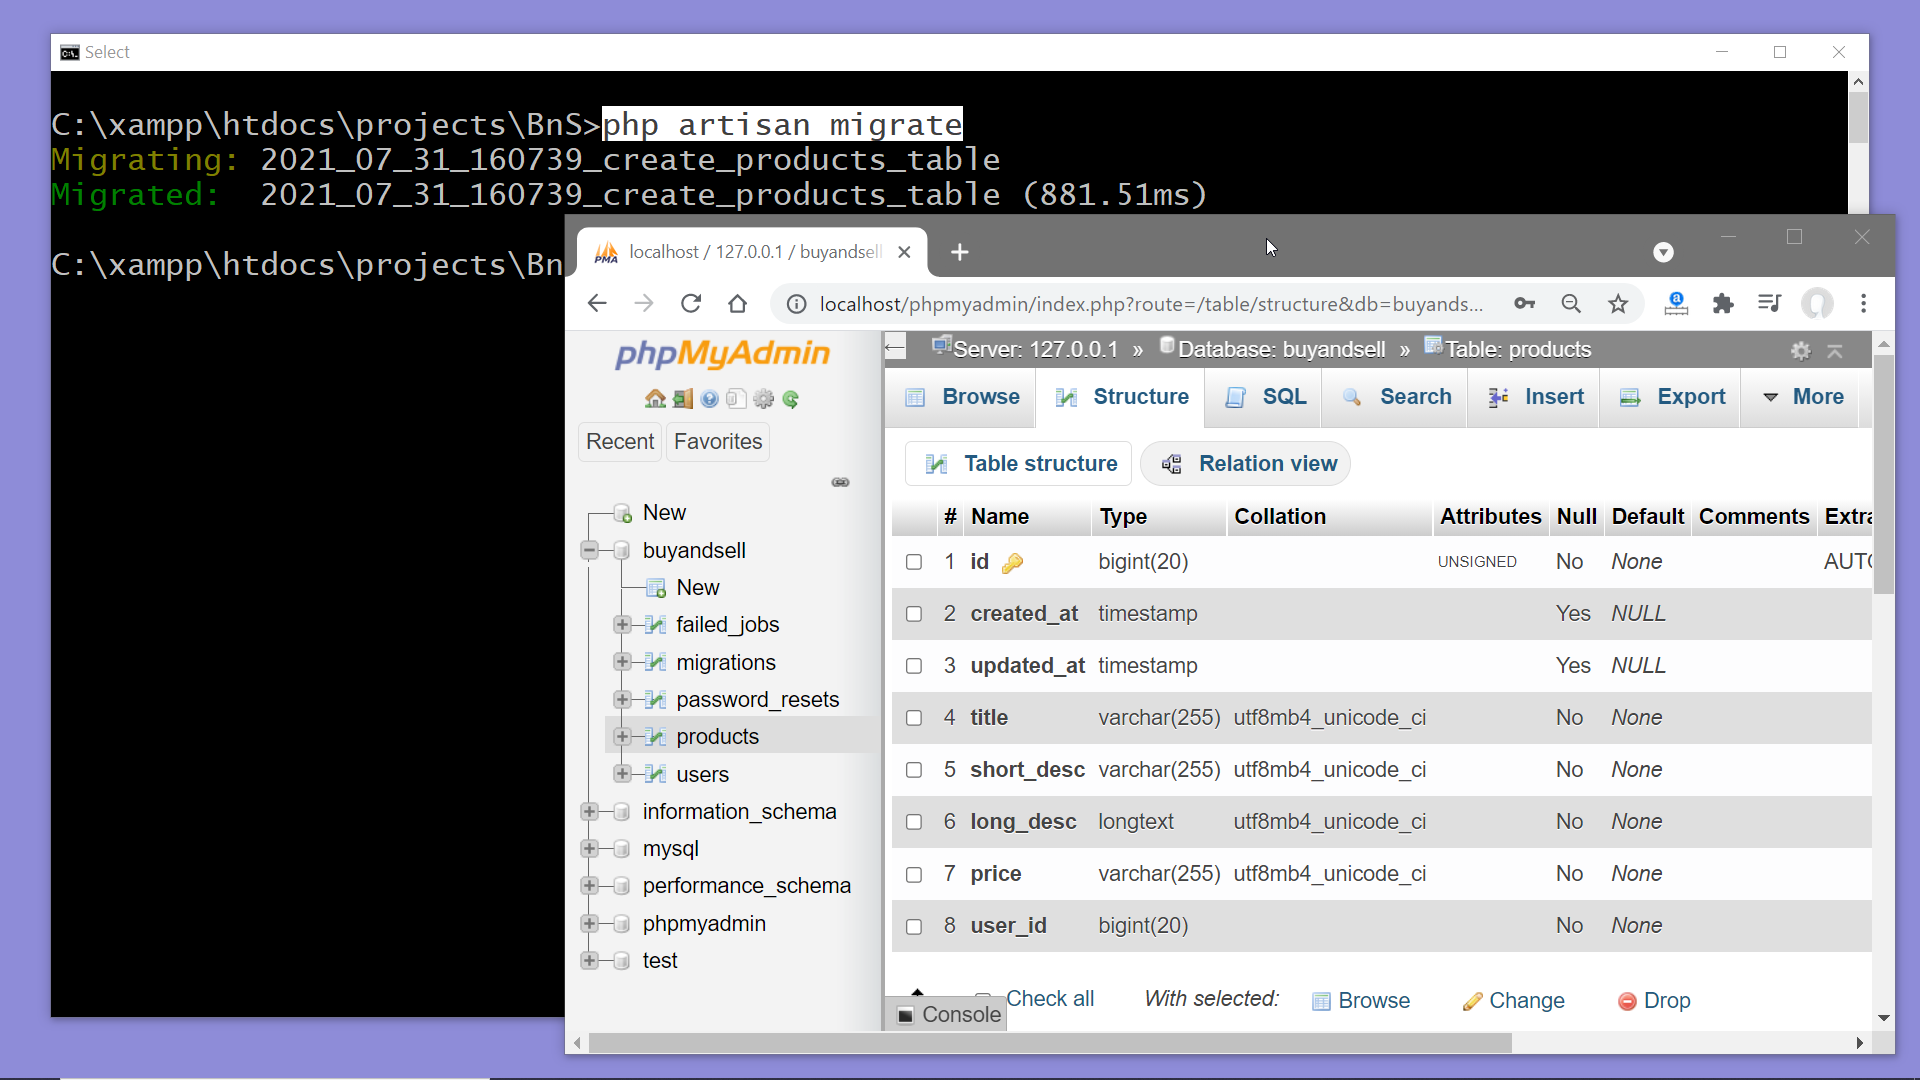
}Step 4: Now, let’s run the migrations, for that we have to run the command –php artisan migrate
And if we take a look at the database on phpMyAdmin we can see the new table named products with the columns as we defined in the schema.
But just now I have realized that we forgot to add a column for storing the product image, so let’s add it. Now if you are thinking that we can add a column easily from the phpMyAdmin page, then you are right..!!….. but there is a problem with this approach.
Let’s consider that you are working on a team, and if you make changes to the database structure you have to convey that information to your teammates so that they update the structure of their local databases.
The better way to do this is to use a migration. Once you share the code with your teammate he/she simply needs to run the migrations once to update the database structure on his system.
So let me show you how to add a column to a database table using migration.
a. The first step is to create a migration by running the commandphp arisan make:migration add_column_image_url_to_products_table
b. A new migration file gets created inside the folder database/migrations open the file. It similar to the earlier migration file but the functions called inside the up() and down() functions are different.
To create a new table we call the function create() of the schema builder and to update a table we have to call the function table(), the syntax is similar though. The first parameter is the name of the table and the second parameter is the function inside which we have to define the schema.
<?php

use Illuminate\Database\Migrations\Migration;
use Illuminate\Database\Schema\Blueprint;
use Illuminate\Support\Facades\Schema;

class AddColumnImageUrlToProductsTable extends Migration
{
    /**
     * Run the migrations.
     *
     * @return void
     */
    public function up()
    {
        Schema::table('products', function (Blueprint $table) {
            //
        });
    }

    /**
     * Reverse the migrations.
     *
     * @return void
     */
    public function down()
    {
        Schema::table('products', function (Blueprint $table) {
            //
        });
    }
}
c. To add a column we have to call one of the many functions available for creating columns of different data types, the way we did while creating the table. Here we shall create a column to store the image URL, which is a string. So call the function string() on the instance of BluePrint. $table->string('image_url');
d. Inside the down() function call the function dropColumn() to remove this column from the table. We have to pass the column name to the function. $table->dropColumn('image_url');
e. Now finally run the migrations with this command php artisan migrate
<?php

use Illuminate\Database\Migrations\Migration;
use Illuminate\Database\Schema\Blueprint;
use Illuminate\Support\Facades\Schema;

class AddColumnImageUrlToProductsTable extends Migration
{
    /**
     * Run the migrations.
     *
     * @return void
     */
    public function up()
    {
        Schema::table('products', function (Blueprint $table) {
            //
            $table->string('image_url');
        });
    }

    /**
     * Reverse the migrations.
     *
     * @return void
     */
    public function down()
    {
        Schema::table('products', function (Blueprint $table) {
            //
             $table->dropColumn('image_url');
        });
    }
}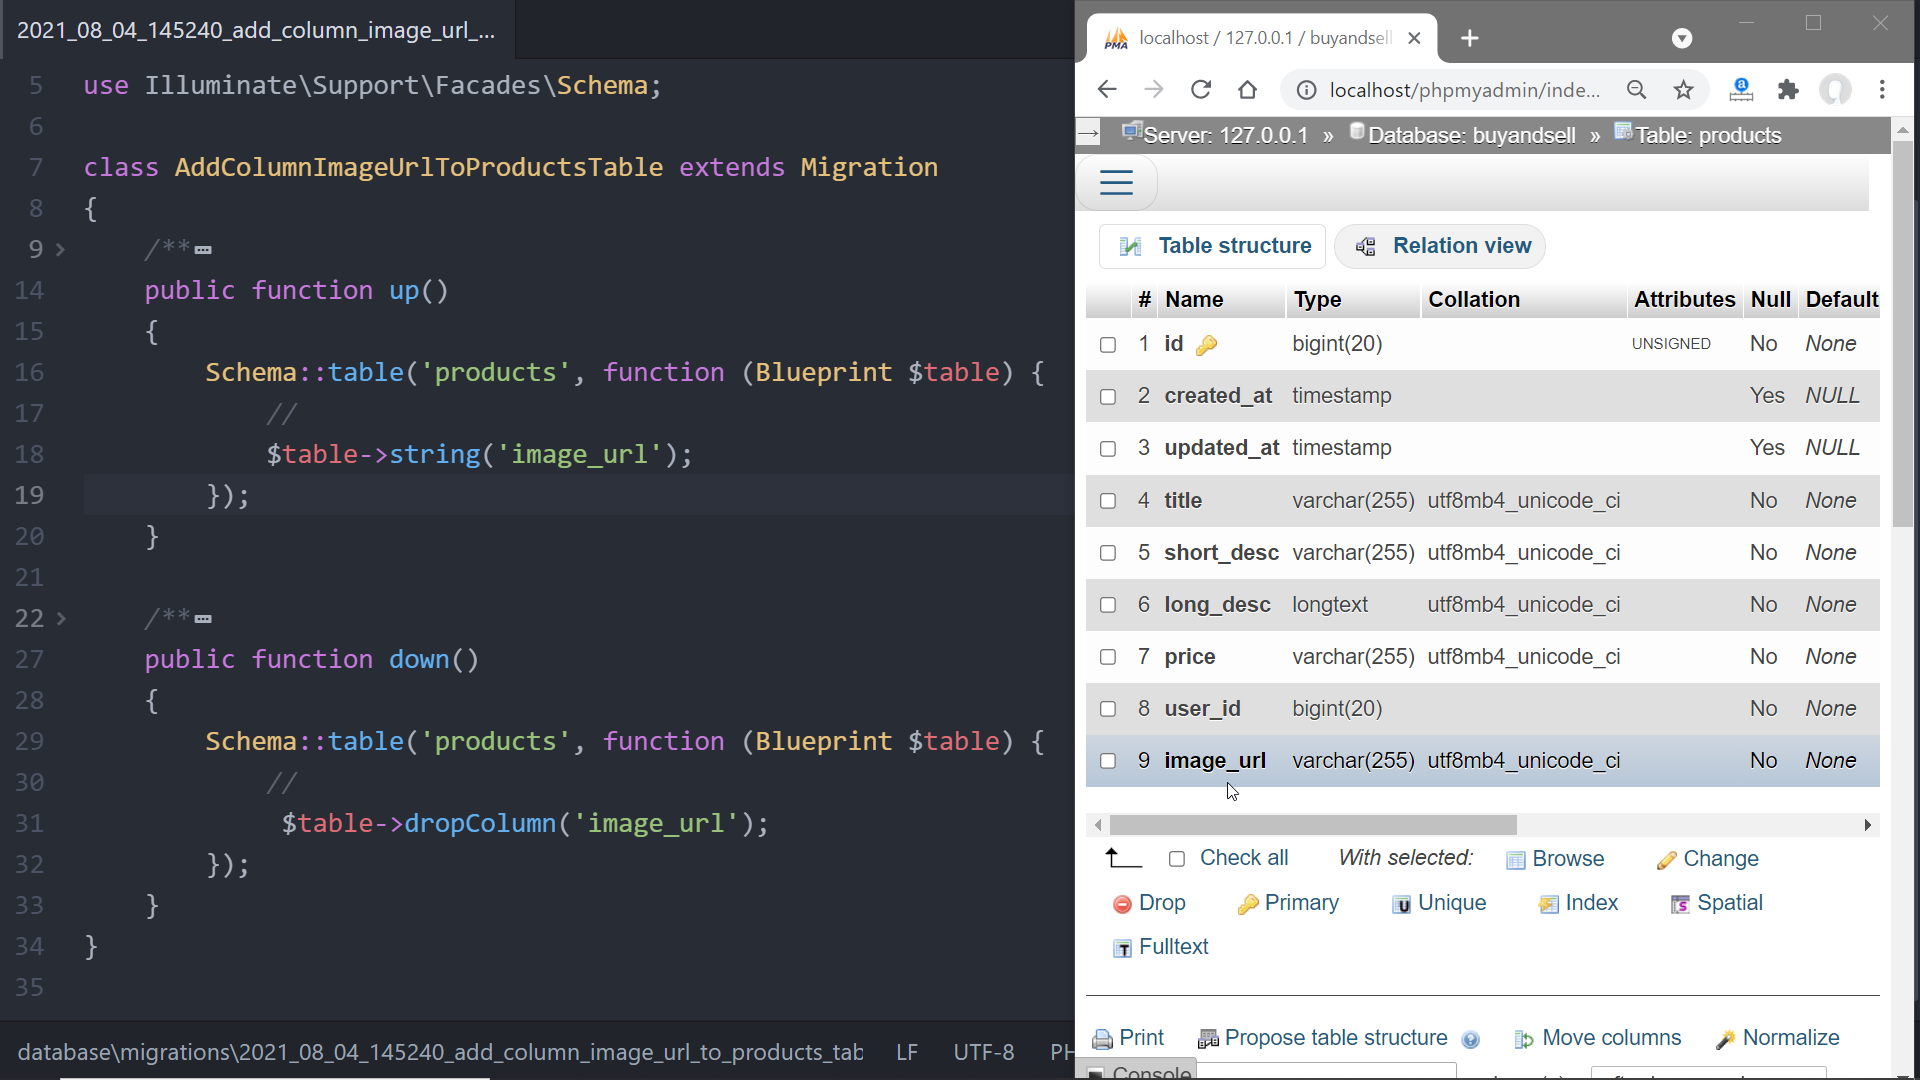
And on phpMyAdmin, we can see the new column has been added to the table products.
With this the structure of our database is complete, next, we have to create the controller and save the information of a product into this products table using the model Product.